Overview
This page features notes on usage and features of Konica Minolta copiers.
- Usage
- Login via Username/Password or RFID Card (requires initial registration of card)
- Features
- Printing, Scanning
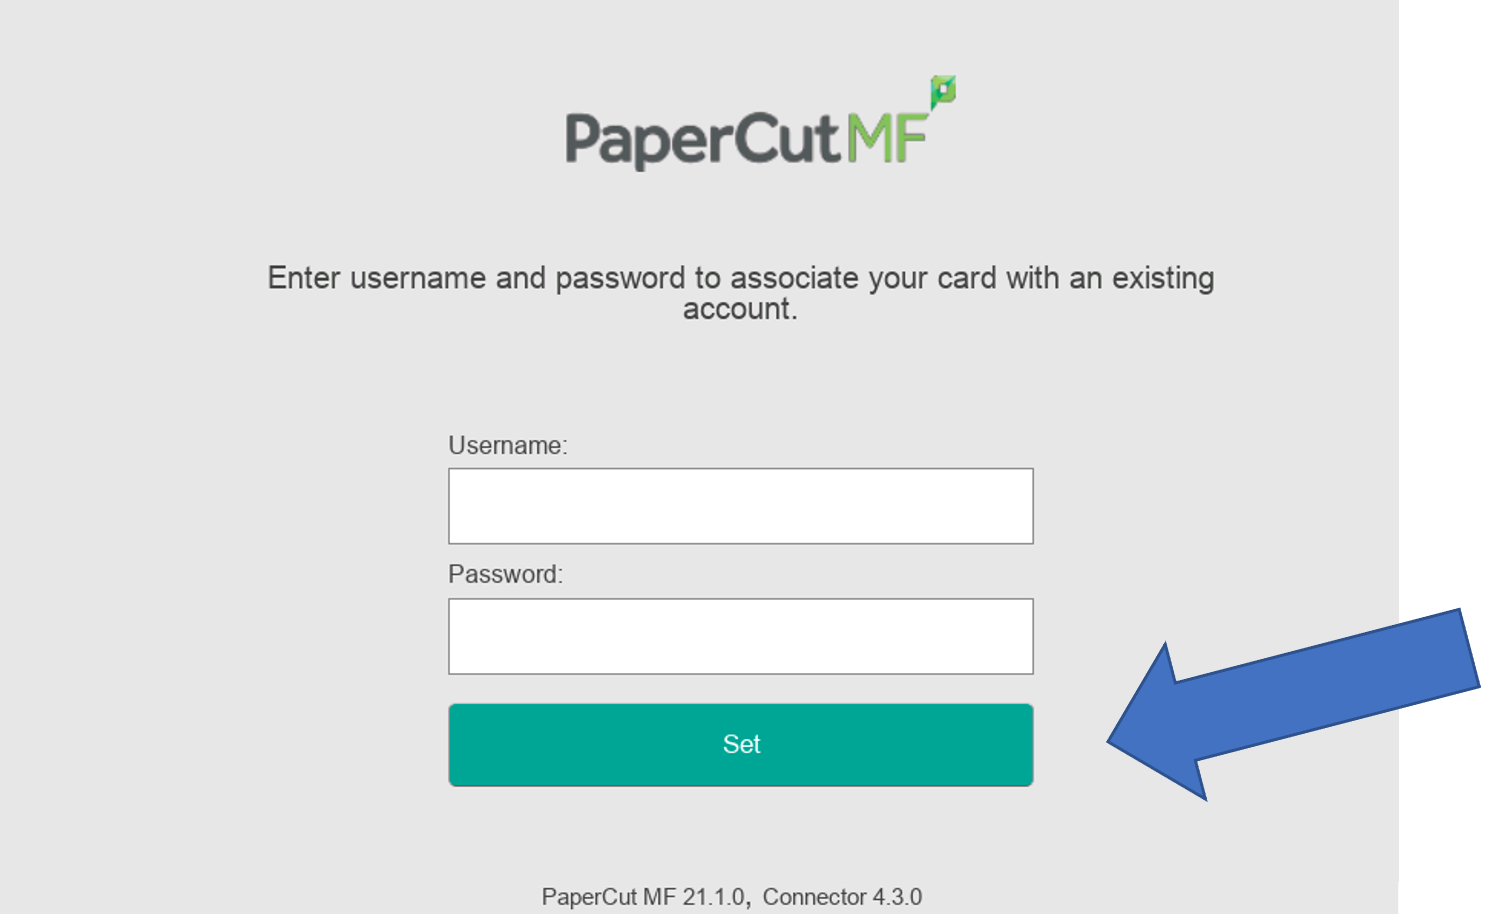
Register a Card (RFID)
Main PaperCut Menu: This is the main menu you will see when you at the copier. You can badge in holding your badge on the (Bulls Eye) decal steady on the front of the copier until your hear a beep.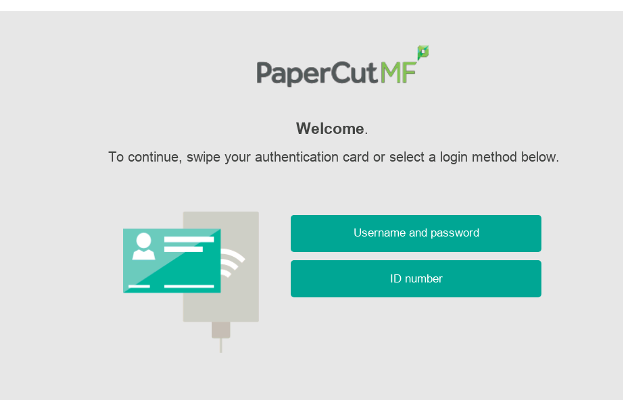
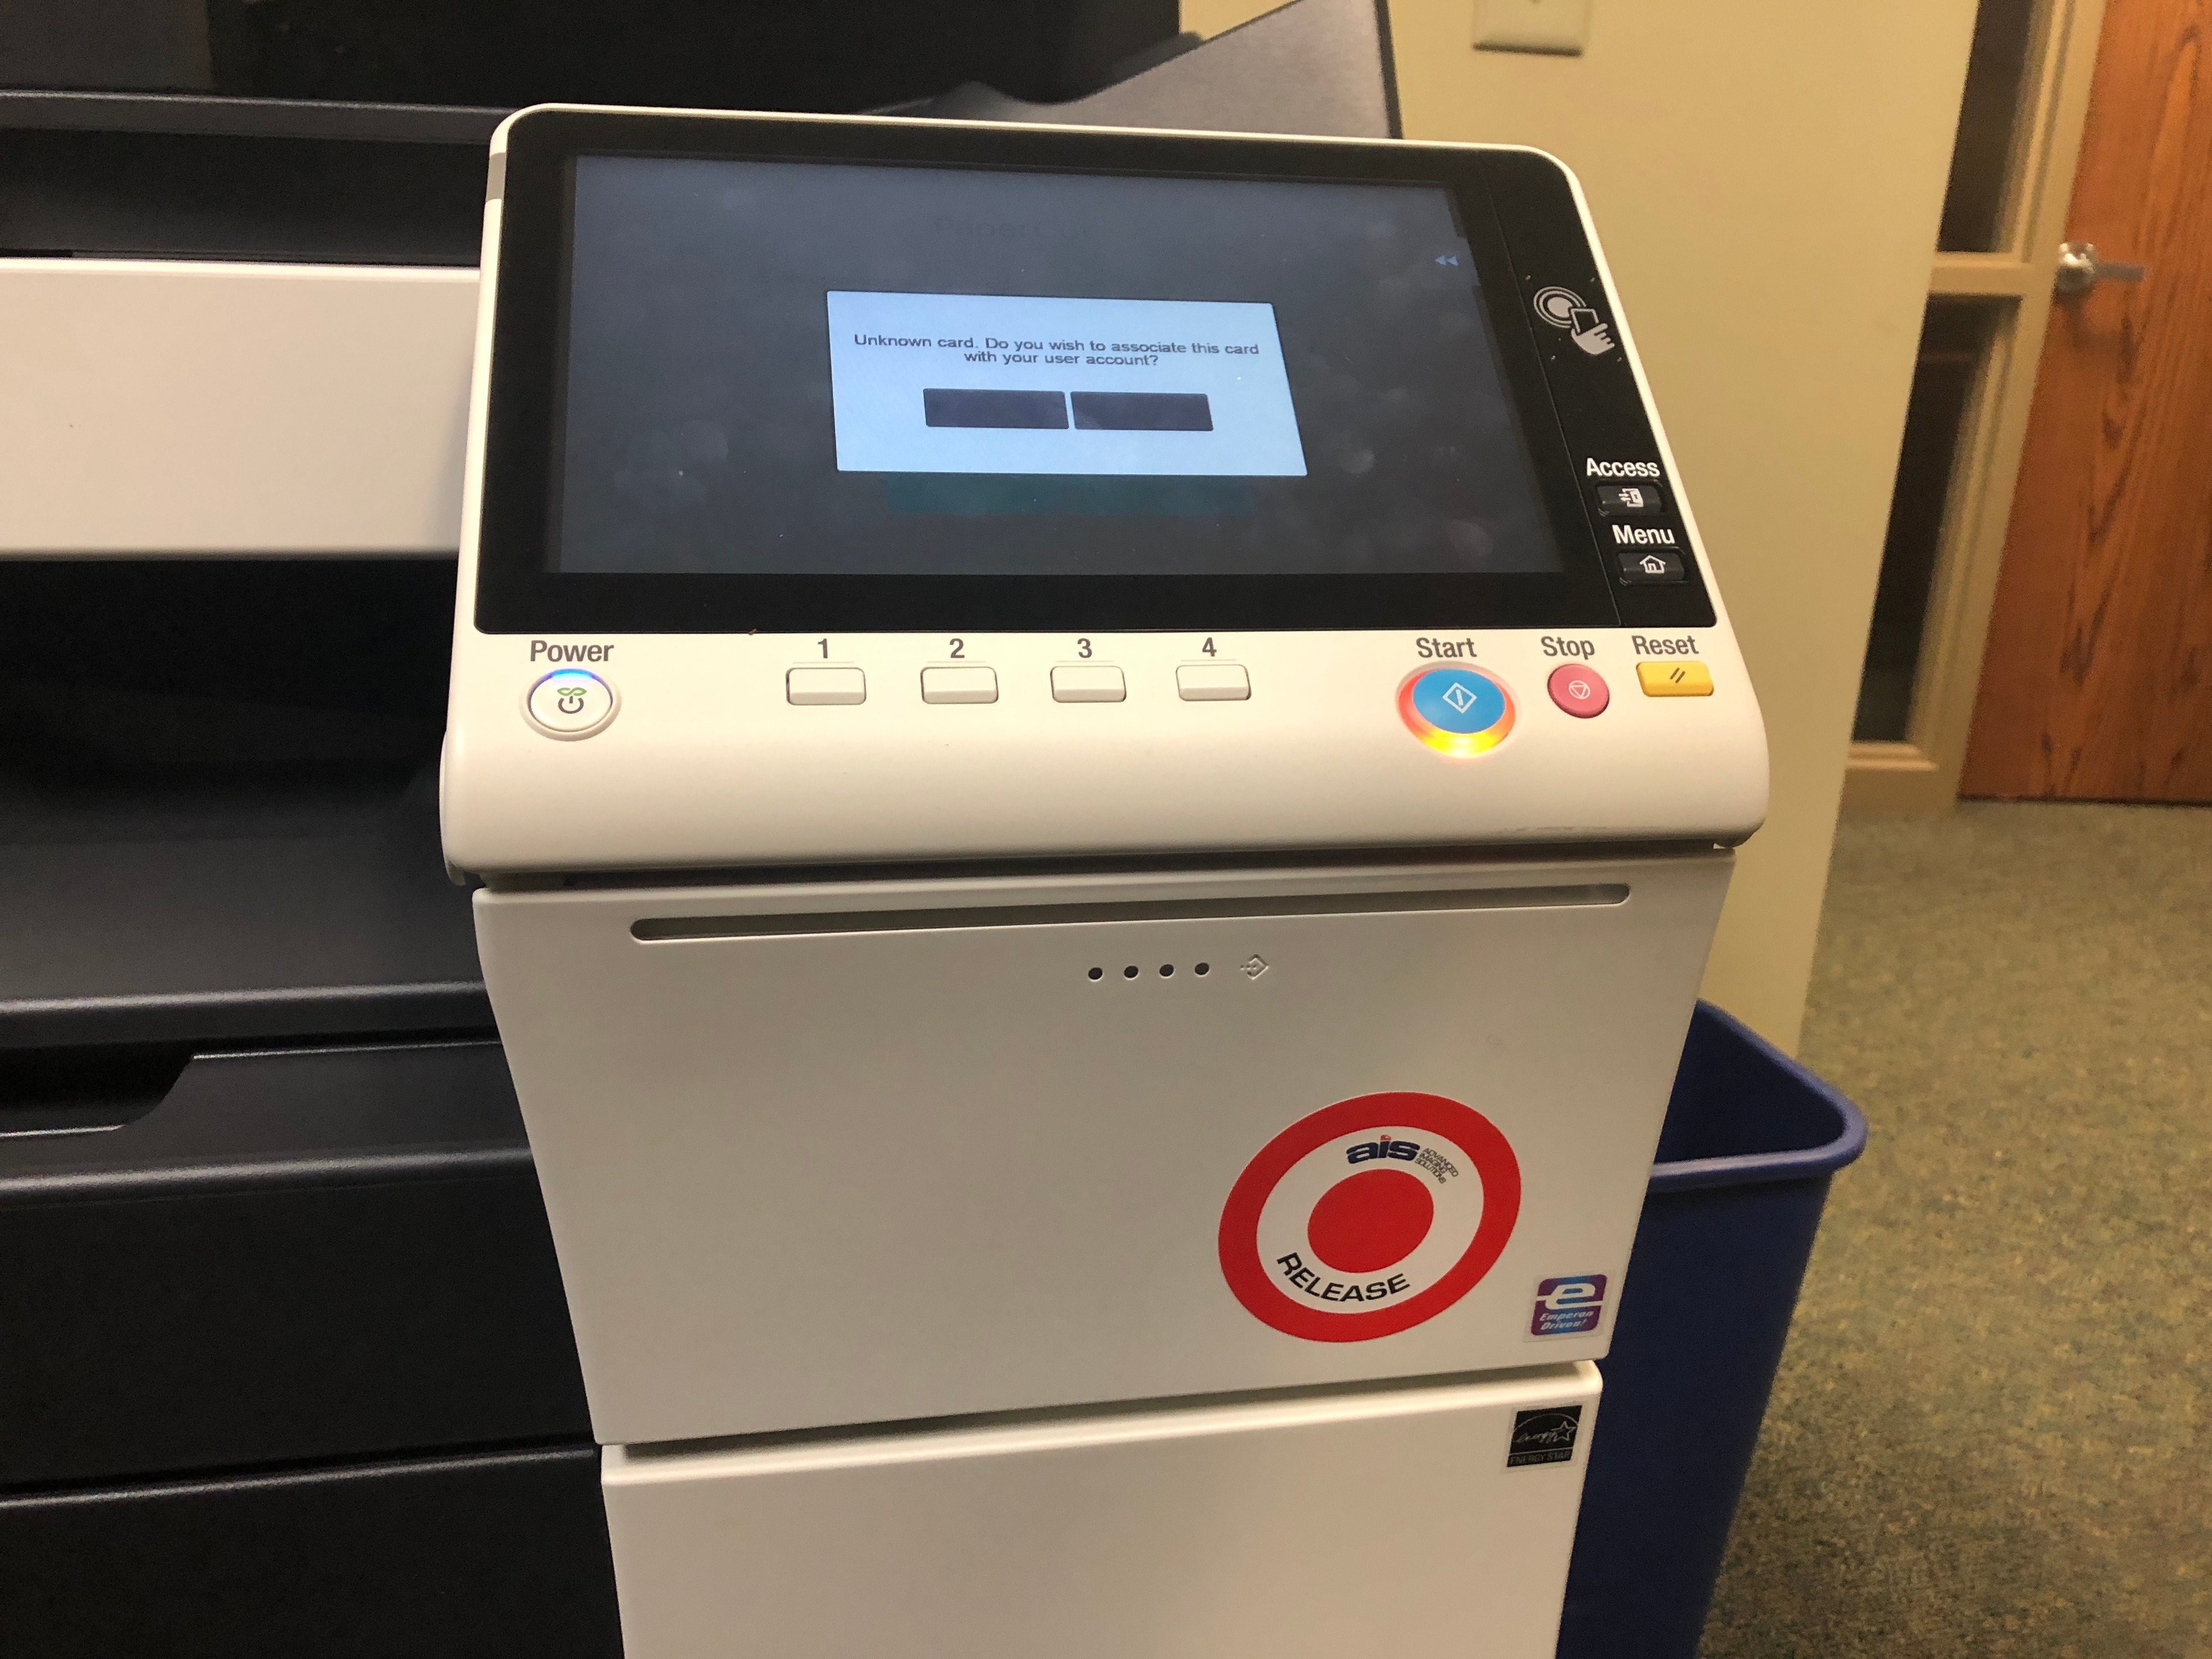
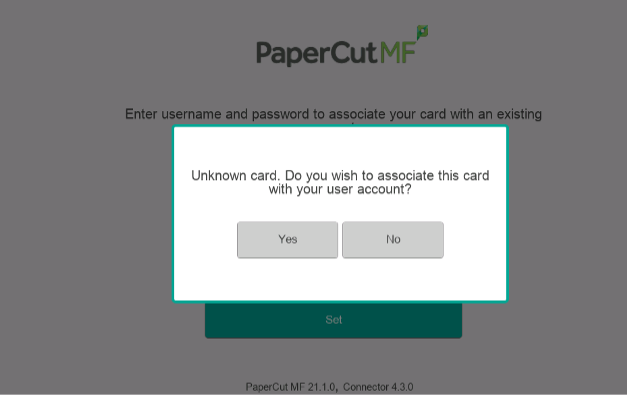
Associate your card at the machine by choosing yes and enter in your computer username and login then choose (set).
Username is your username with no email address information. For example, nstrauss and NOT 123456@shakopee.k12.mn.us.
Once complete you can badge in again and you will have access to the copier and PaperCut functions.
DeleteRelease Print Job
Once you badge into the PaperCut software you will either be directed to release your print jobs that you sent, or you may see this screen. This screen allows you to release your print jobs, make copies, scan or fax from the device. Choose your best option.
If you send a print job to any of the Shakopee copiers on campus you can badge into any of them and release your jobs. Select one or all to release, then choose print at the bottom of the screen to release.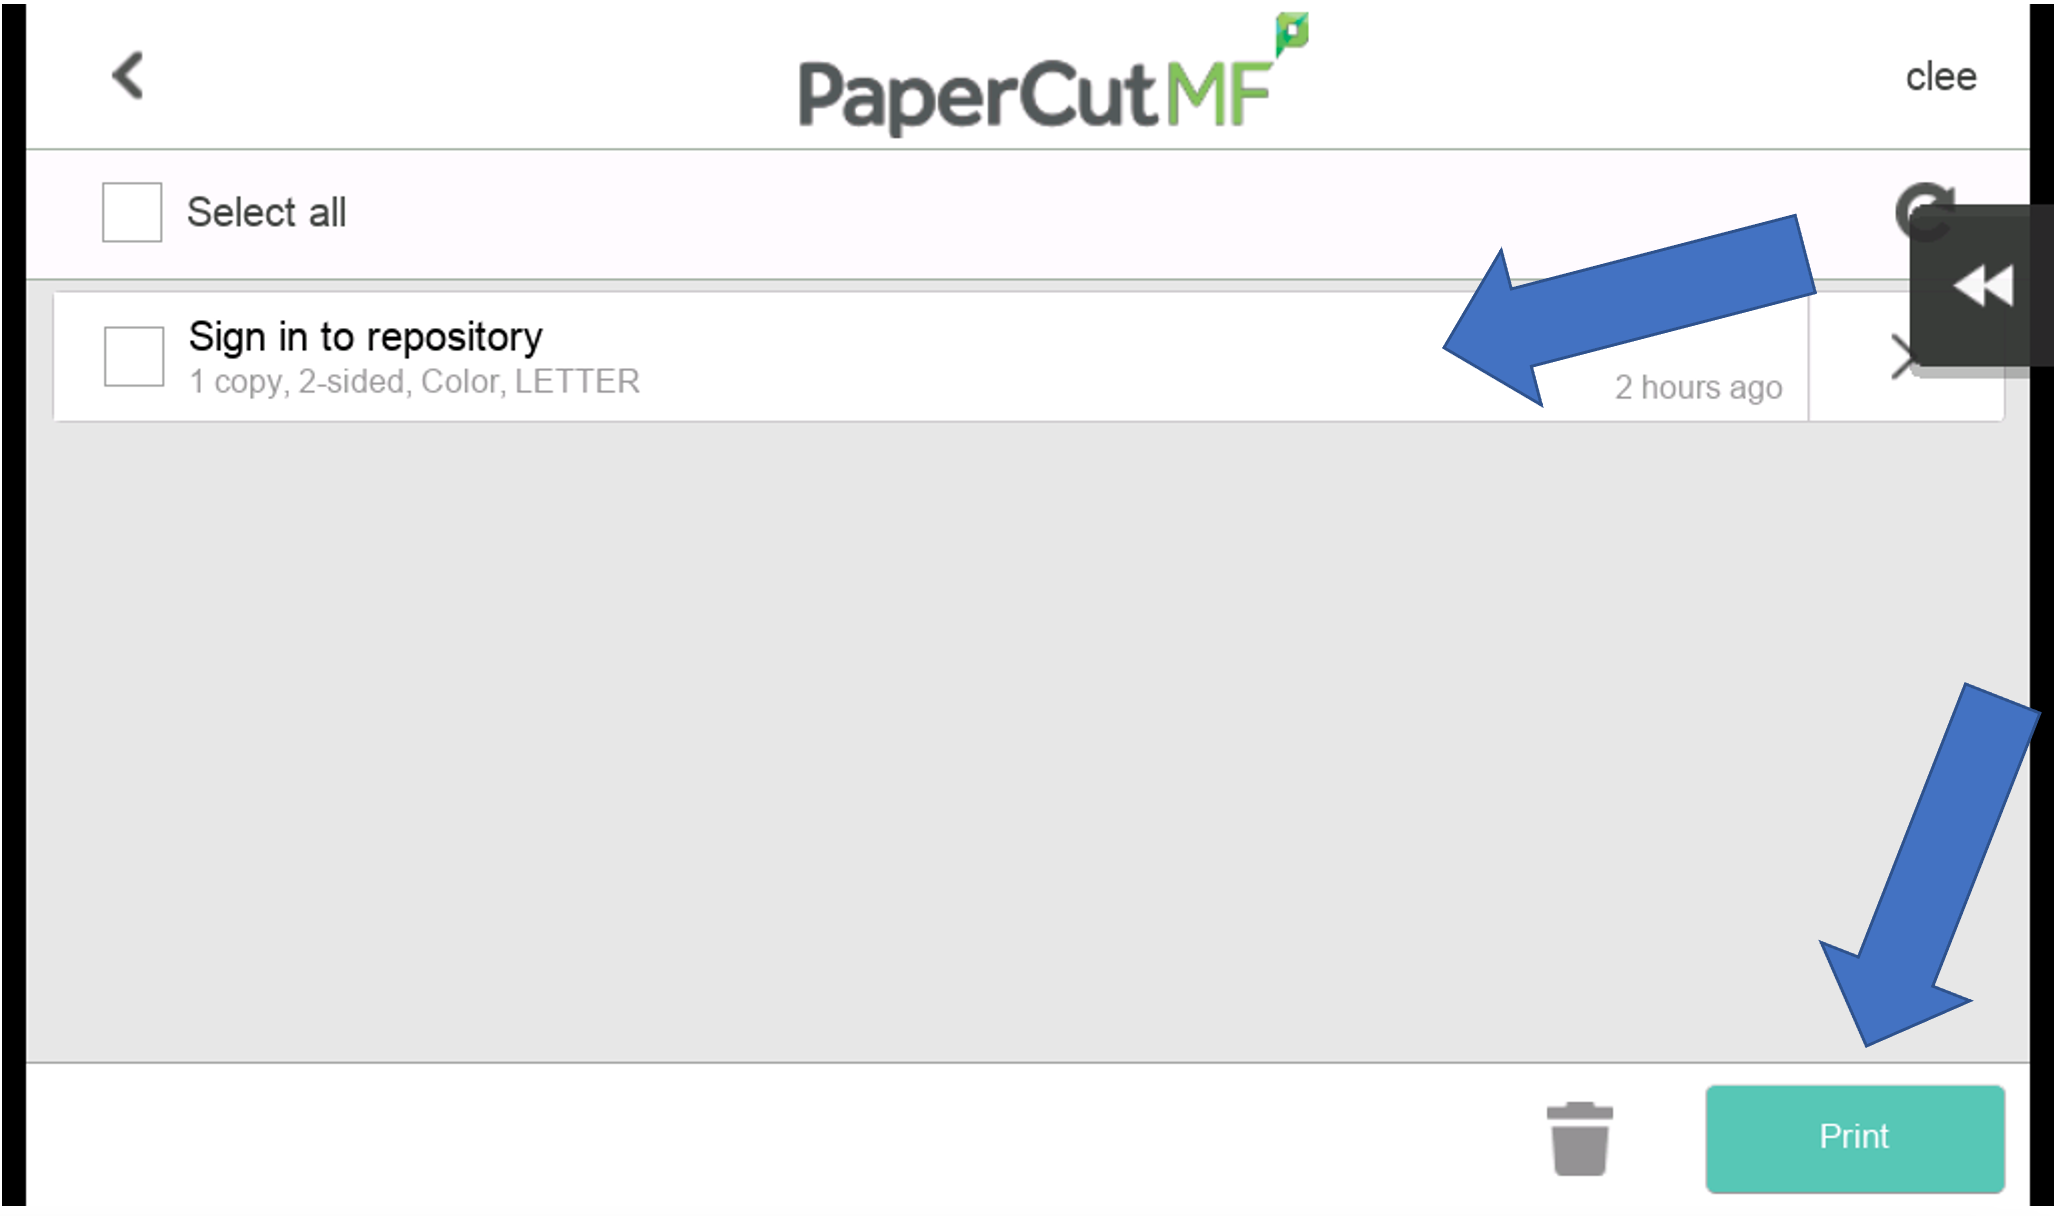
Copying
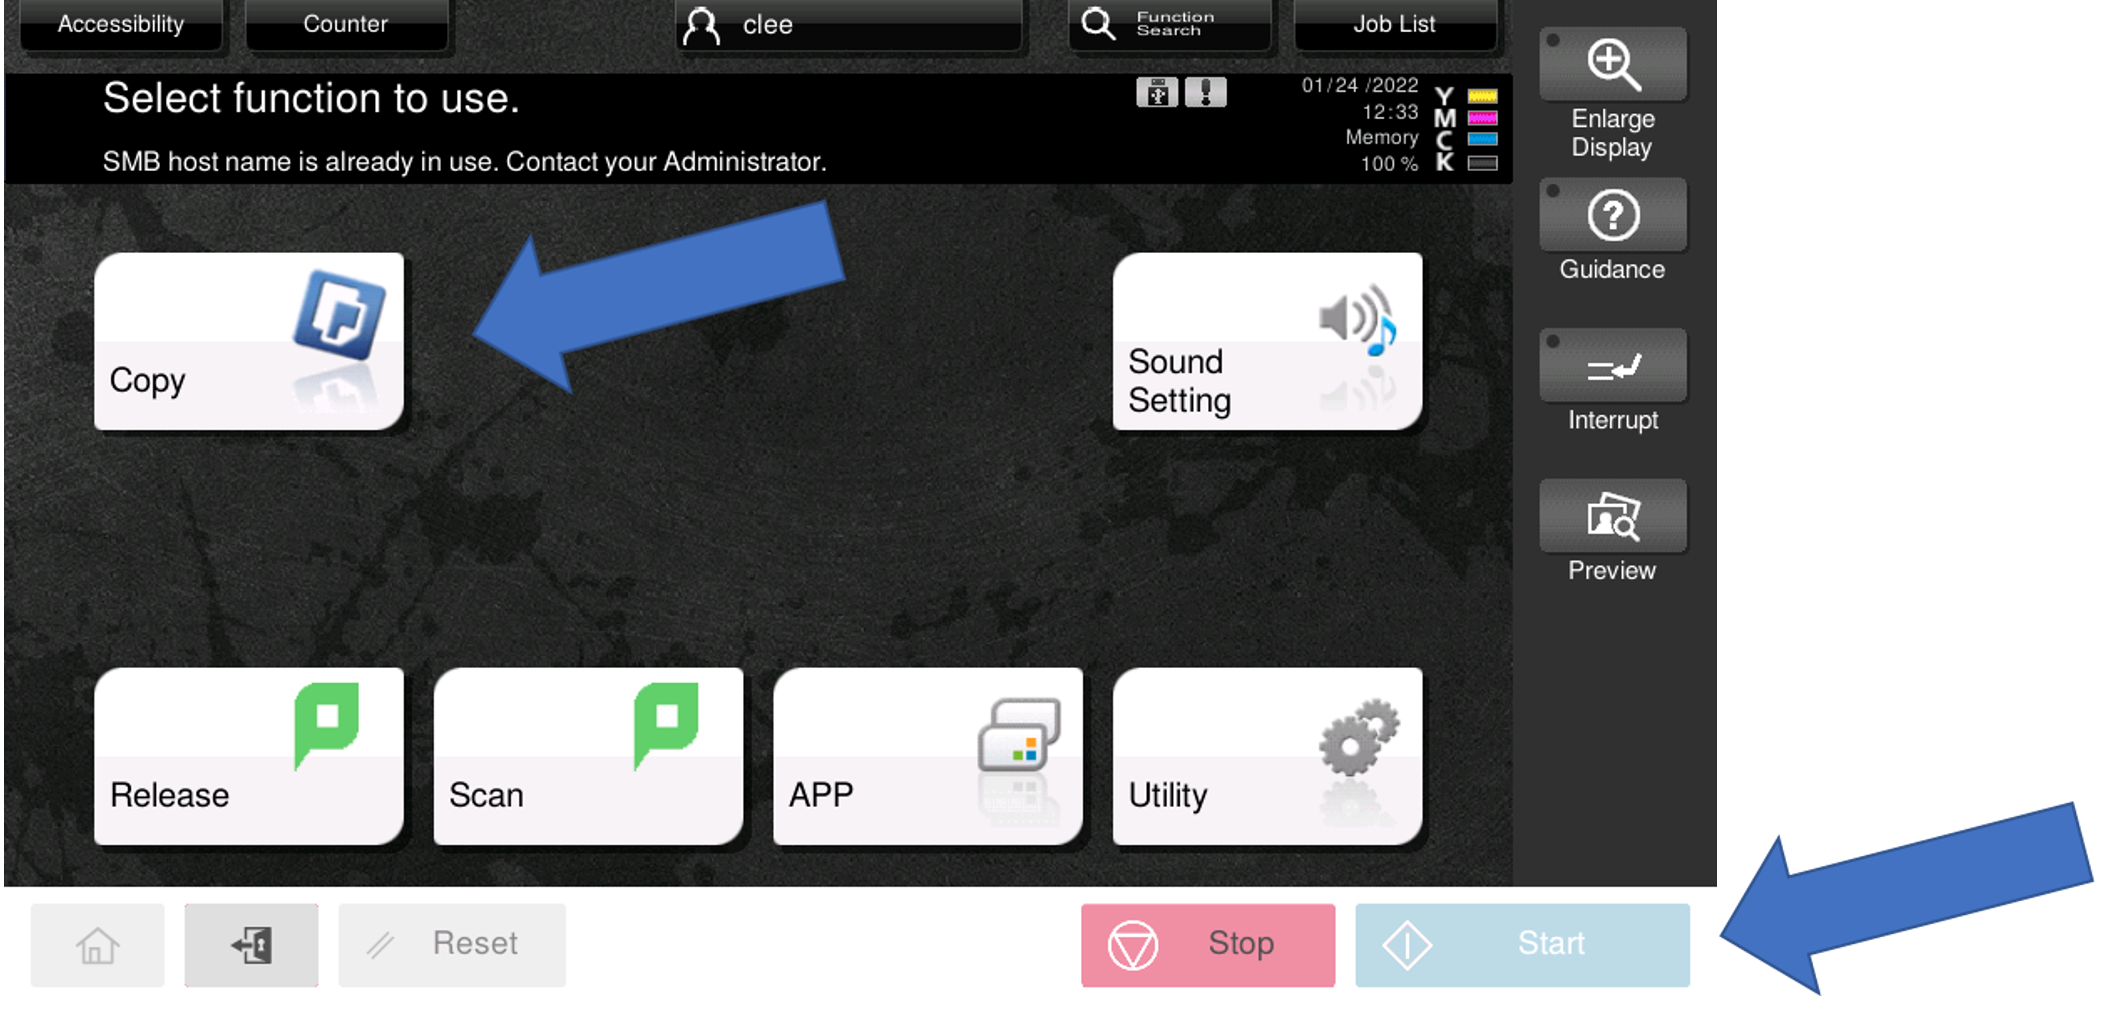
Once you badge into the PaperCut software you will either be directed to release your print jobs that you sent, or you may see this screen. This screen allows you to release your print jobs, make copies, scan or fax from the device. For copying, choose Device Functions.

Main copy menu where you can choose color, number of copies, 1-2 sided or any finishing options.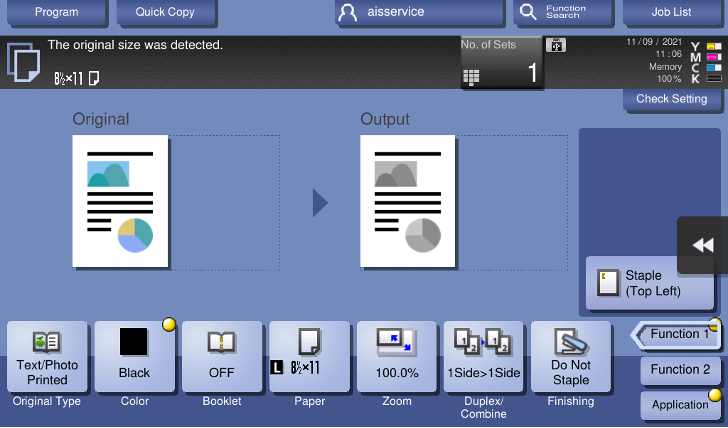
Faxing
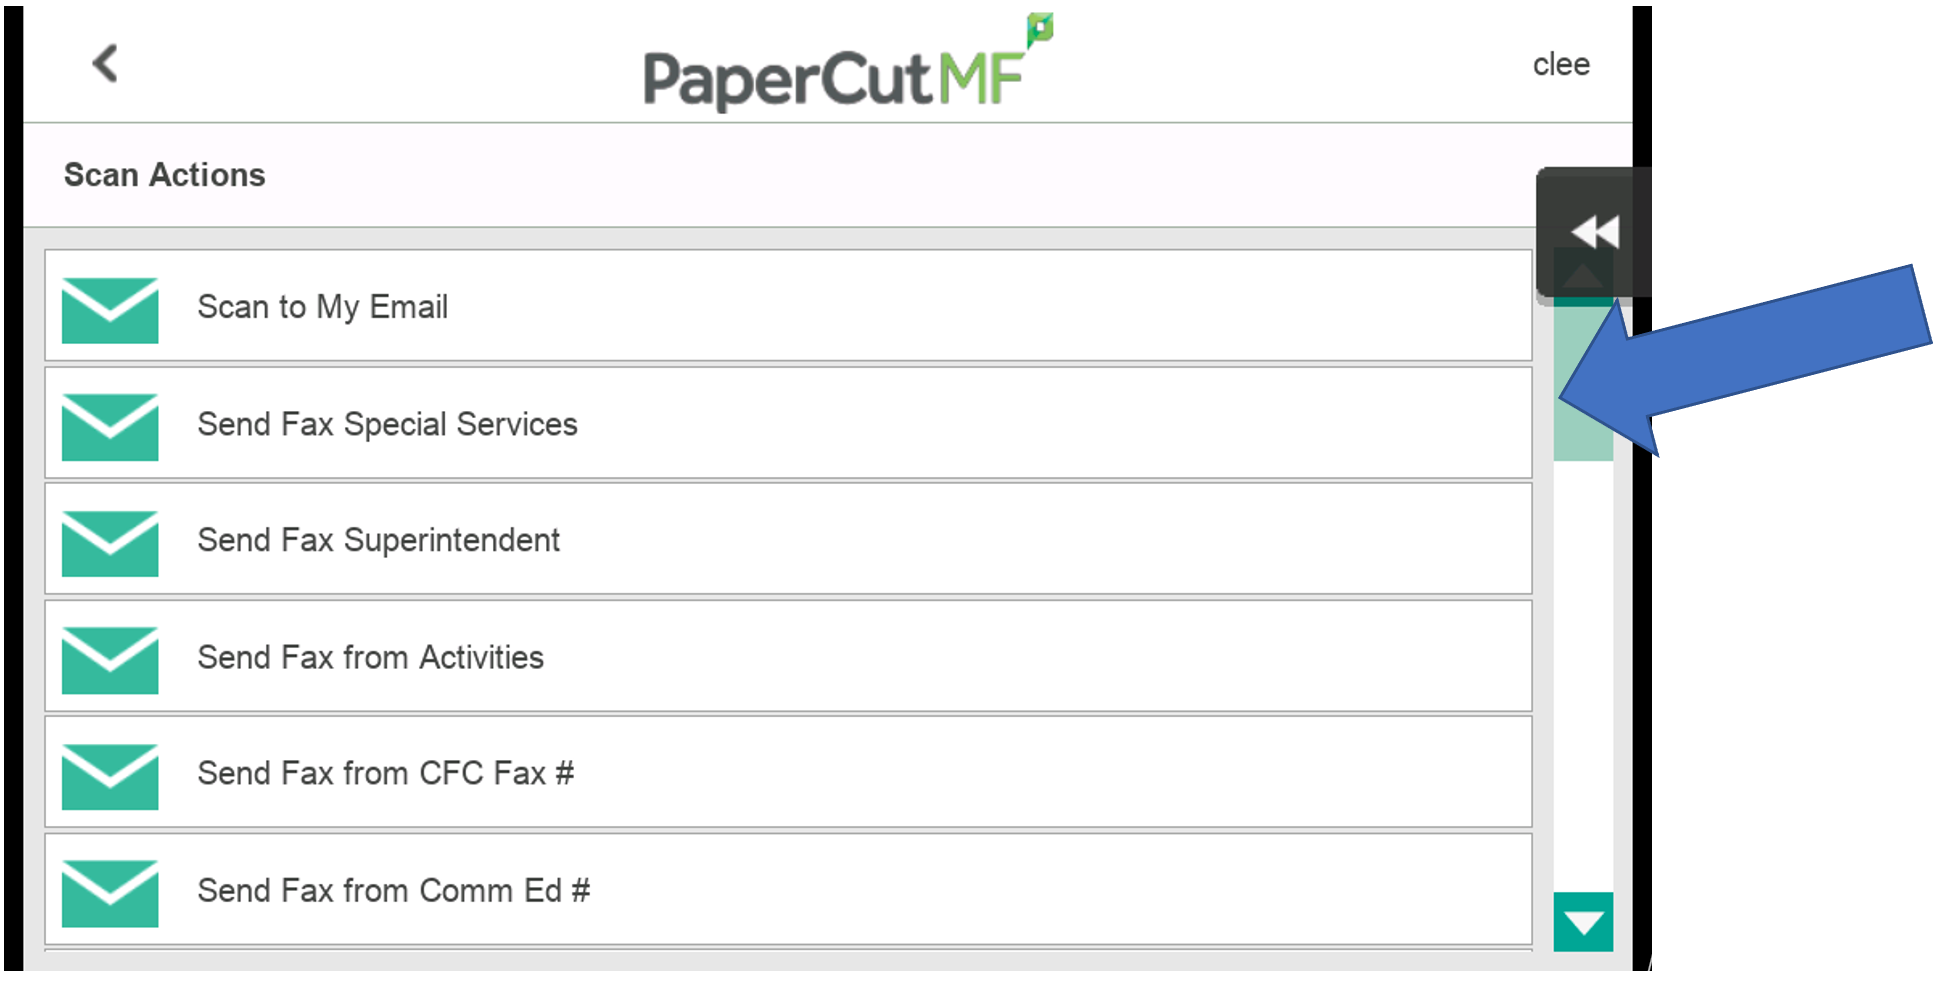
For faxing, start with the Scan option.

Choose the appropriate Send Fax option.
Numbers to send as are limited based on your account.
Enter destination fax number (Do not include leading 9)
System will send email to your shakopee.k12.mn.us on fax status.
Scanning
Scan documents as a PDF to your shakopee.k12.mn.us mailbox.
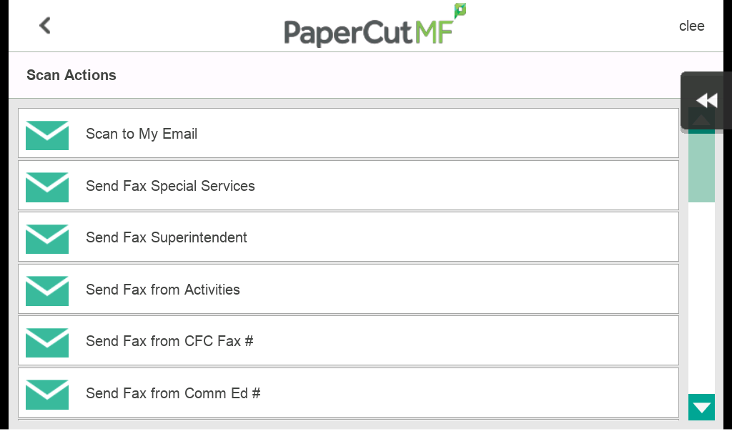
Start with the Scan option.

Choose the Scan to My Email option.
You will see this menu before you send your scan to the destination of your choice, you can change scan settings in this menu or just choose start. Editing settings is particularly important if you are scanning double-sided, as it will default to single-sided scanning unless you tell it otherwise.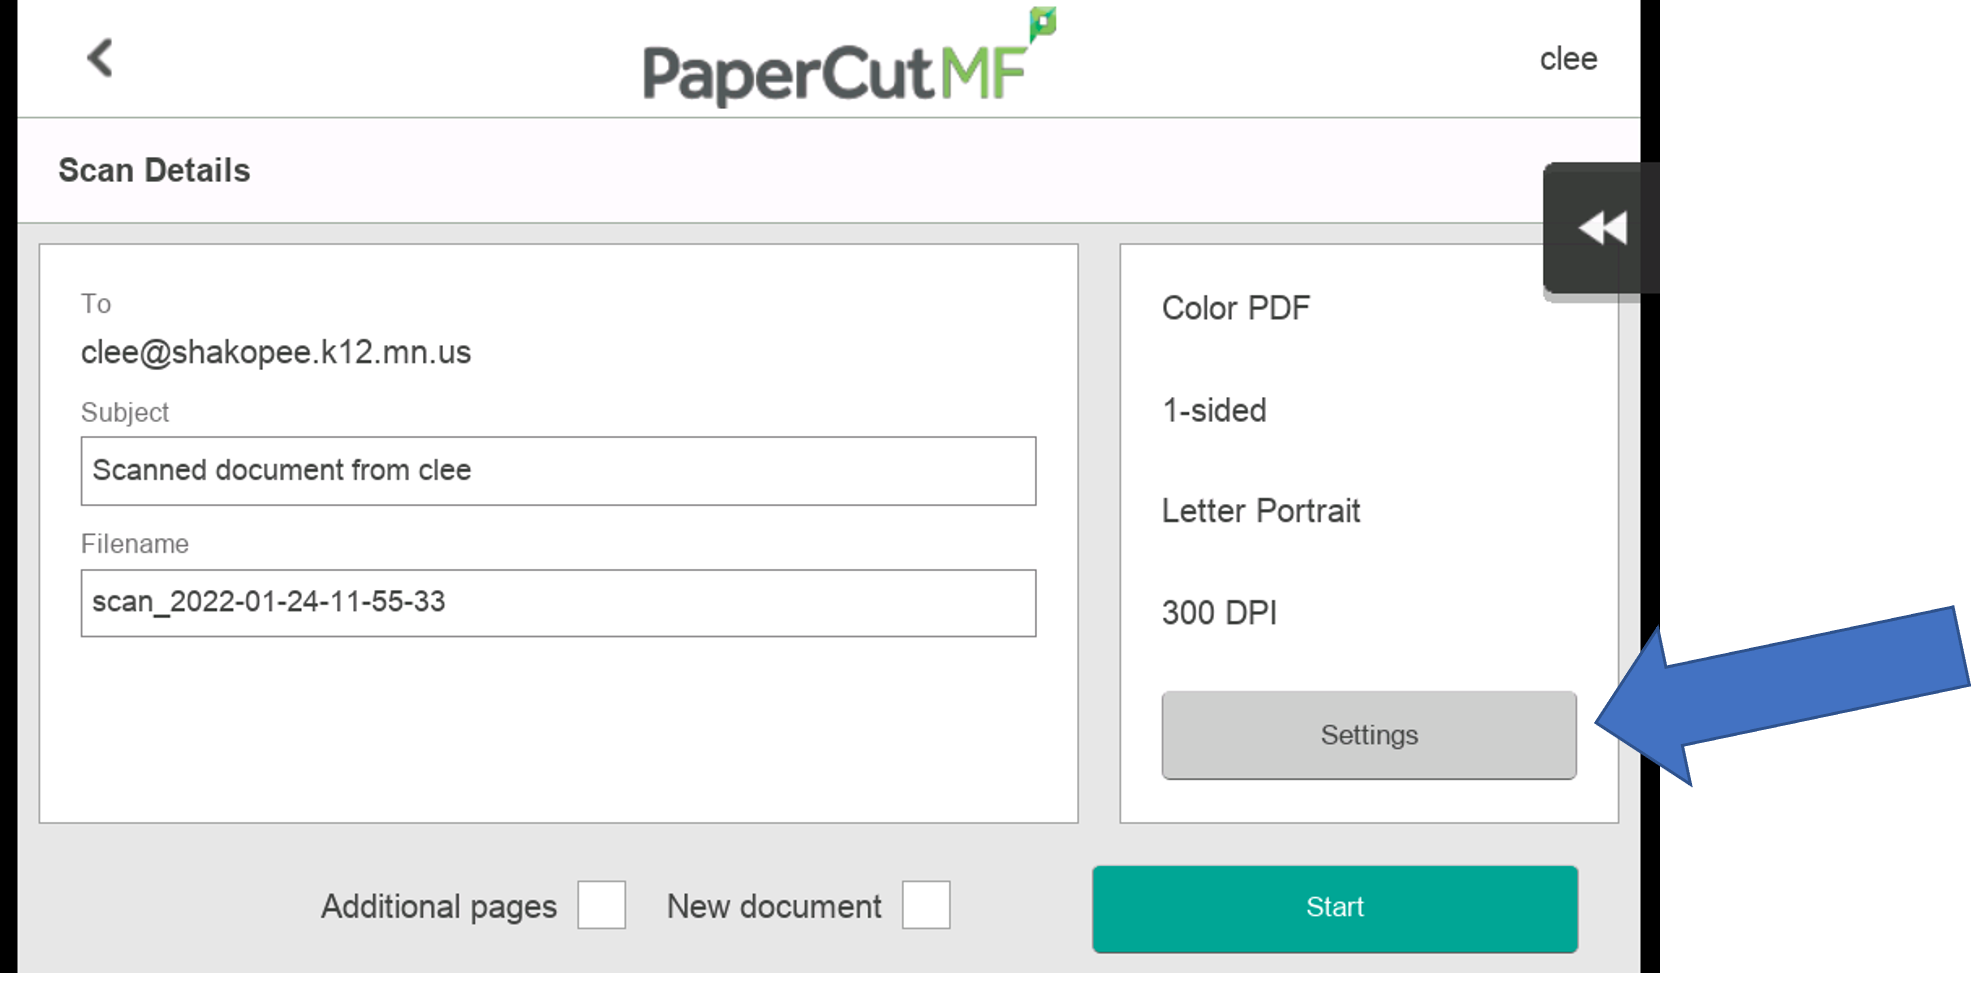
Default Print Settings
How to adjust default setting various within the software\application being printed from.
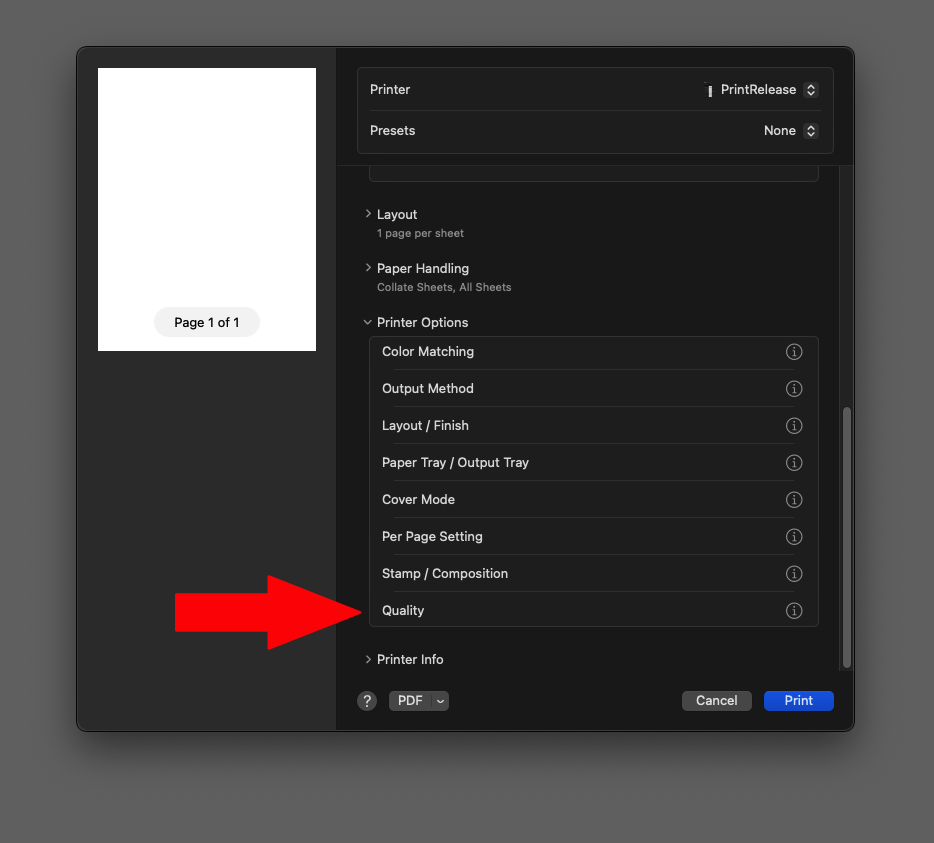
Select desired print option (use back arrow to return if desire both)
-
Single Sided
-
Color
- Add Button
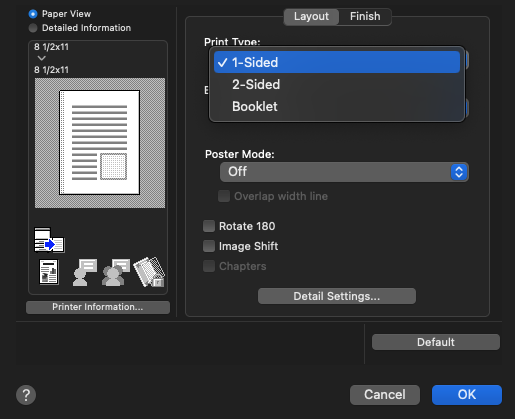
Change Print Type from 2-sided to 1-sided.
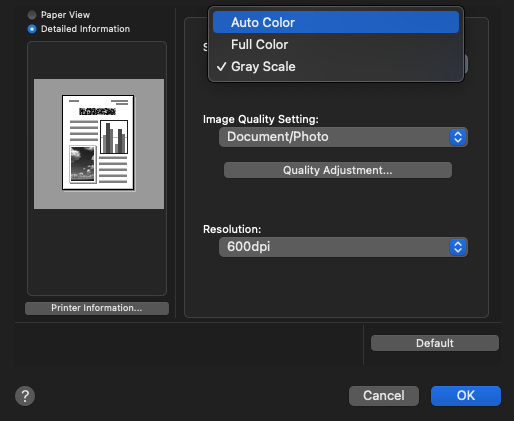
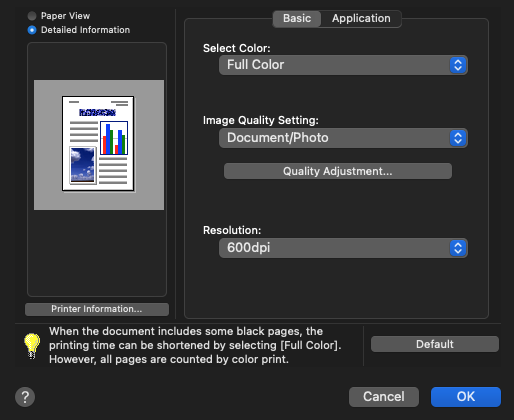
Change Select Color from Gray Scale to Full Color or Auto Color.
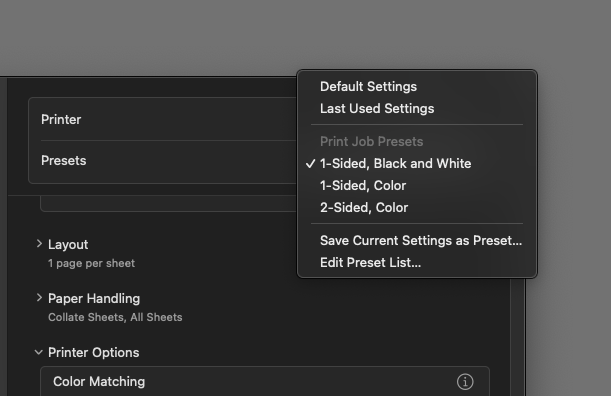
Setting Presets
Presets are a quick and easy way to change print settings. The district's default settings are 2-sided and black and white, but you may need to change these settings at times.
Presets are located below the printer name in the print panel.

To create a preset:
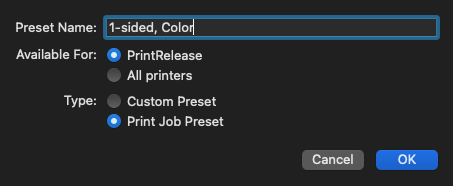
1. Change the settings you want to change. In this example, I changed Print Type to 1-sided and changed Print Color to Full Color.
After you select the settings you want, go back to the main print panel and click Default Settings by Presets, and then choose Save Current Settings as Preset...

Give your preset a name.
You can now repeat the steps above for the other setting combinations, such as 2-sided Color, 1-sided Black and white.
Once you save those settings as presets, the next time you need to print with different settings, you can access those by clicking the preset options on the main printer panel.