
Overview
This page features notes on usage and features of Konica Minolta copiers.
- Usage
- Login via Username/Password or RFID Card (requires initial registration of card)
- Features
- Printing, Scanning
Installation
-
Macbook
- Add Button
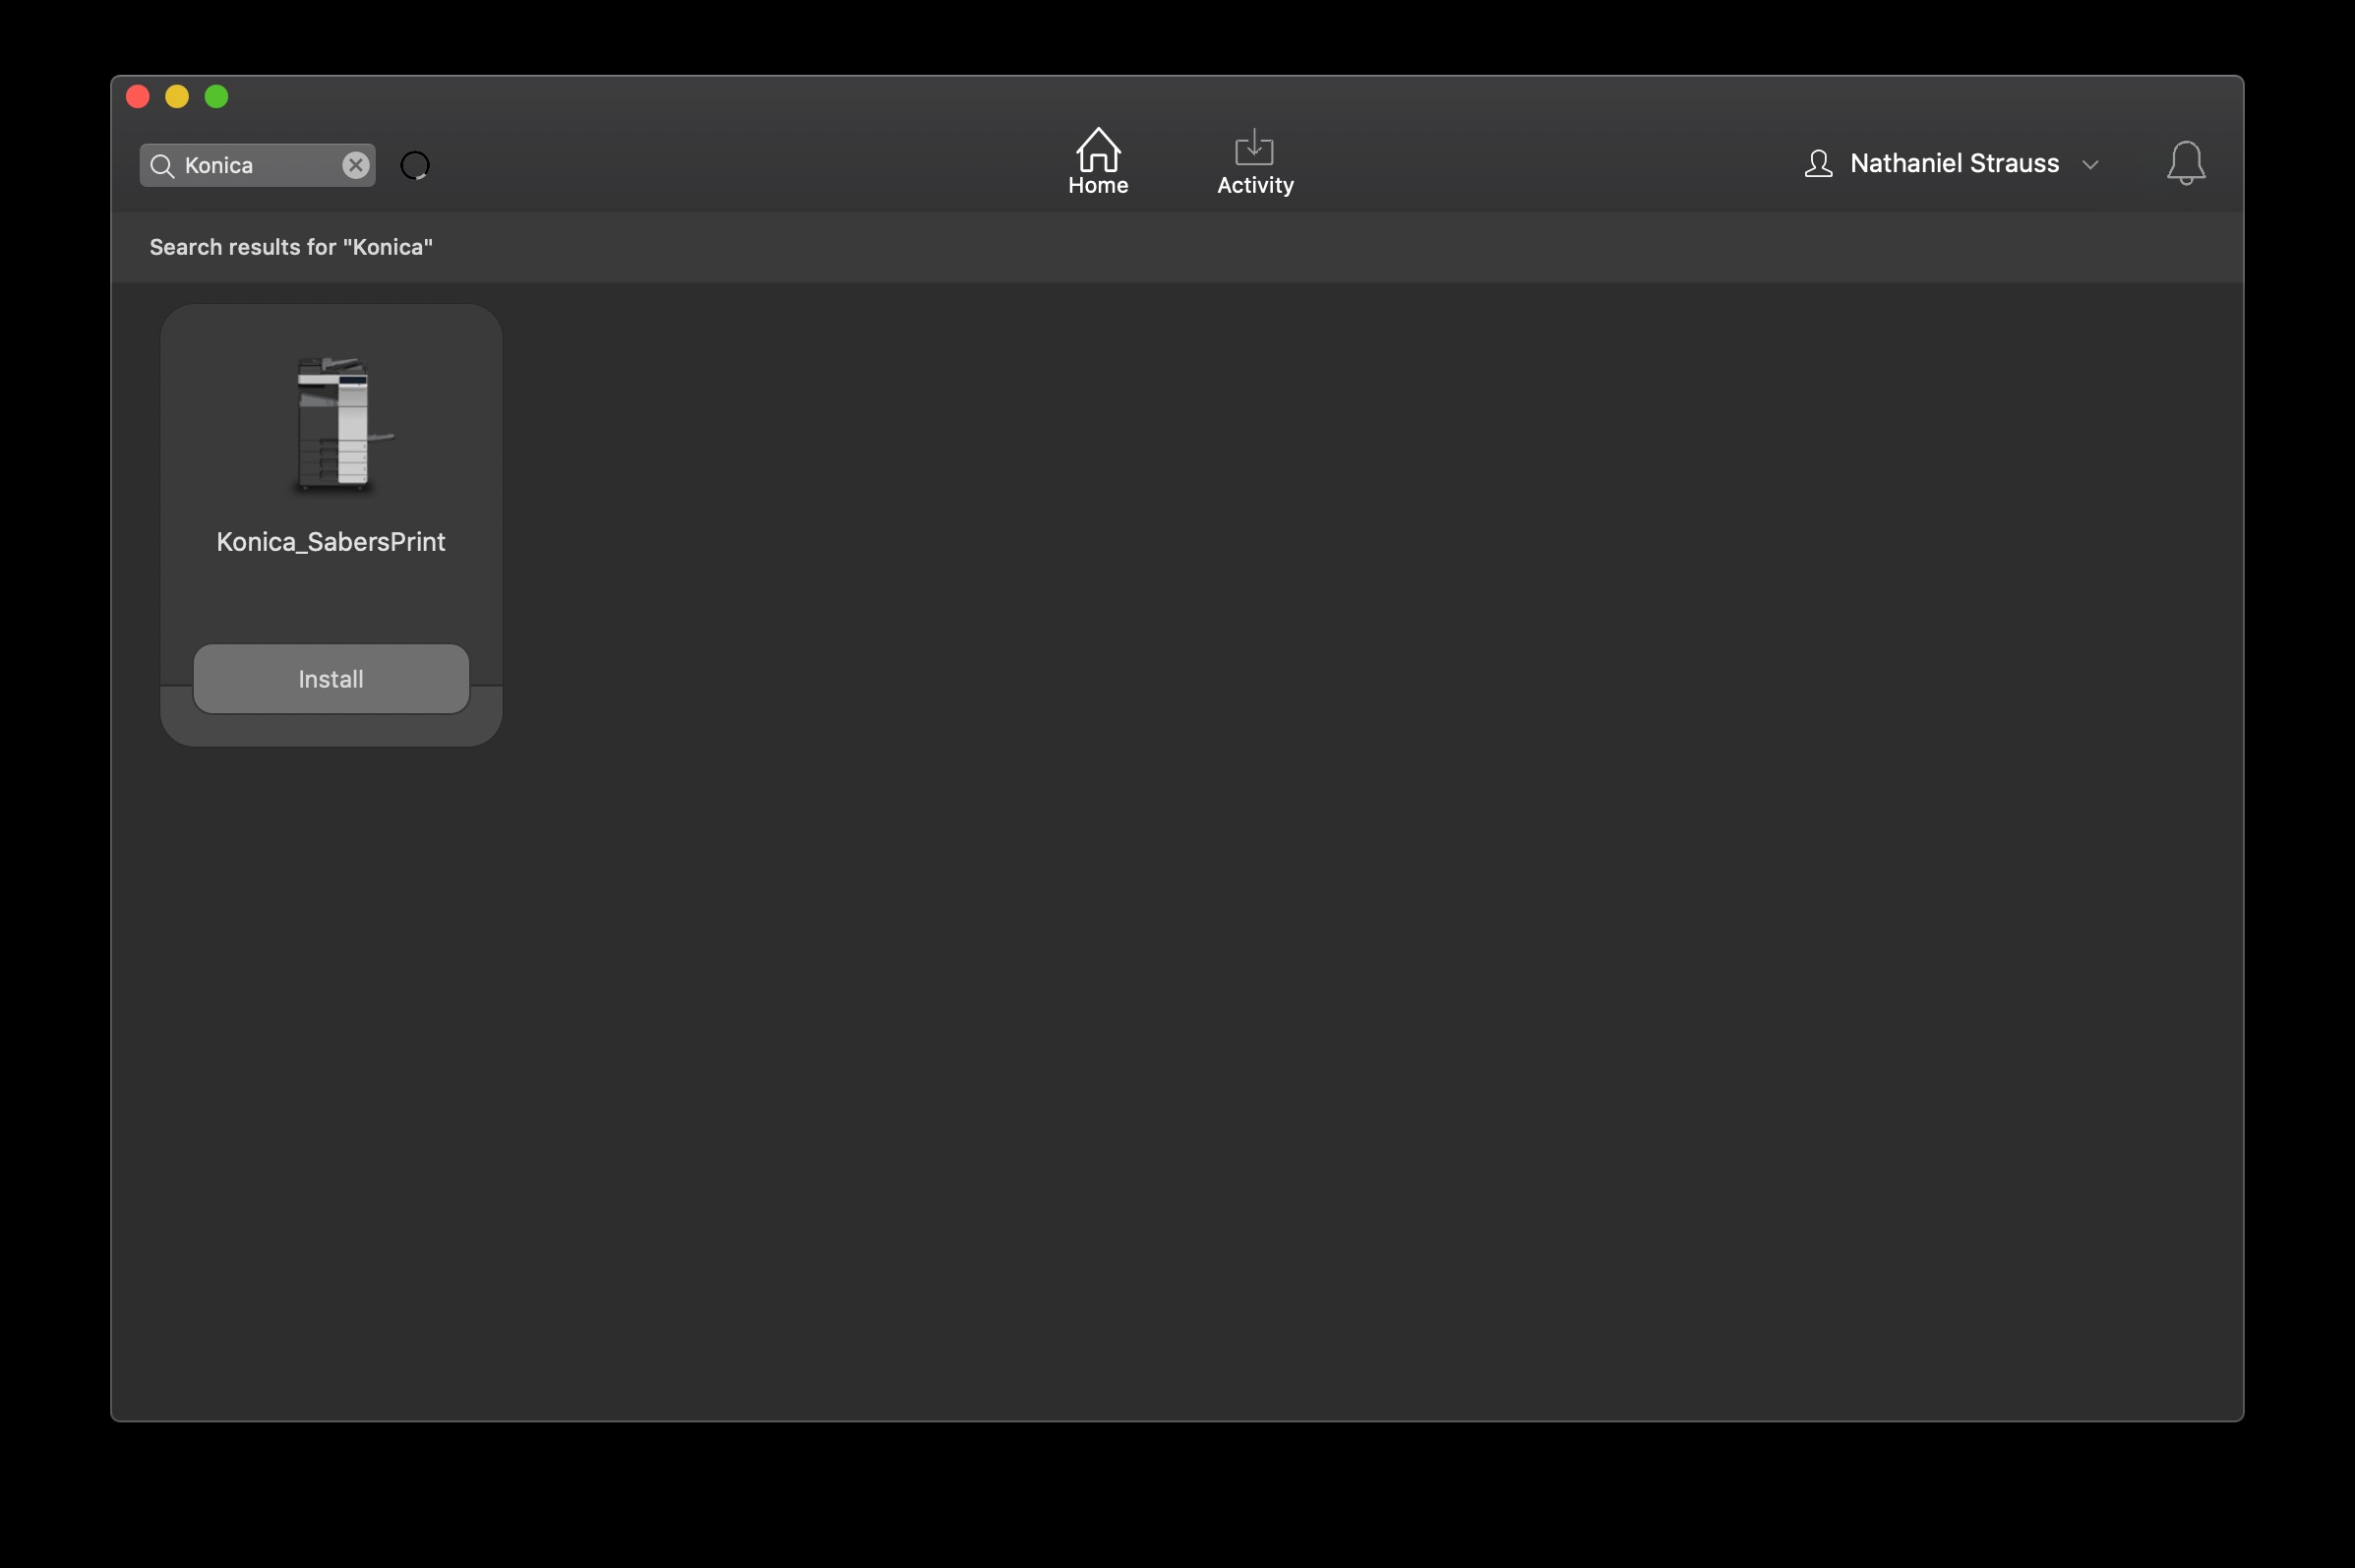
Go to Self Service.
Locate the Konica_SabersPrint. Select Install.
Note the following default settings, in case you wish to change them when printing OR when releasing the job at the printer.
- Double-sided
- Black & White
RFID Registration
Scan your badge directly below the copier touch screen. The scan area is marked by a red sticker.
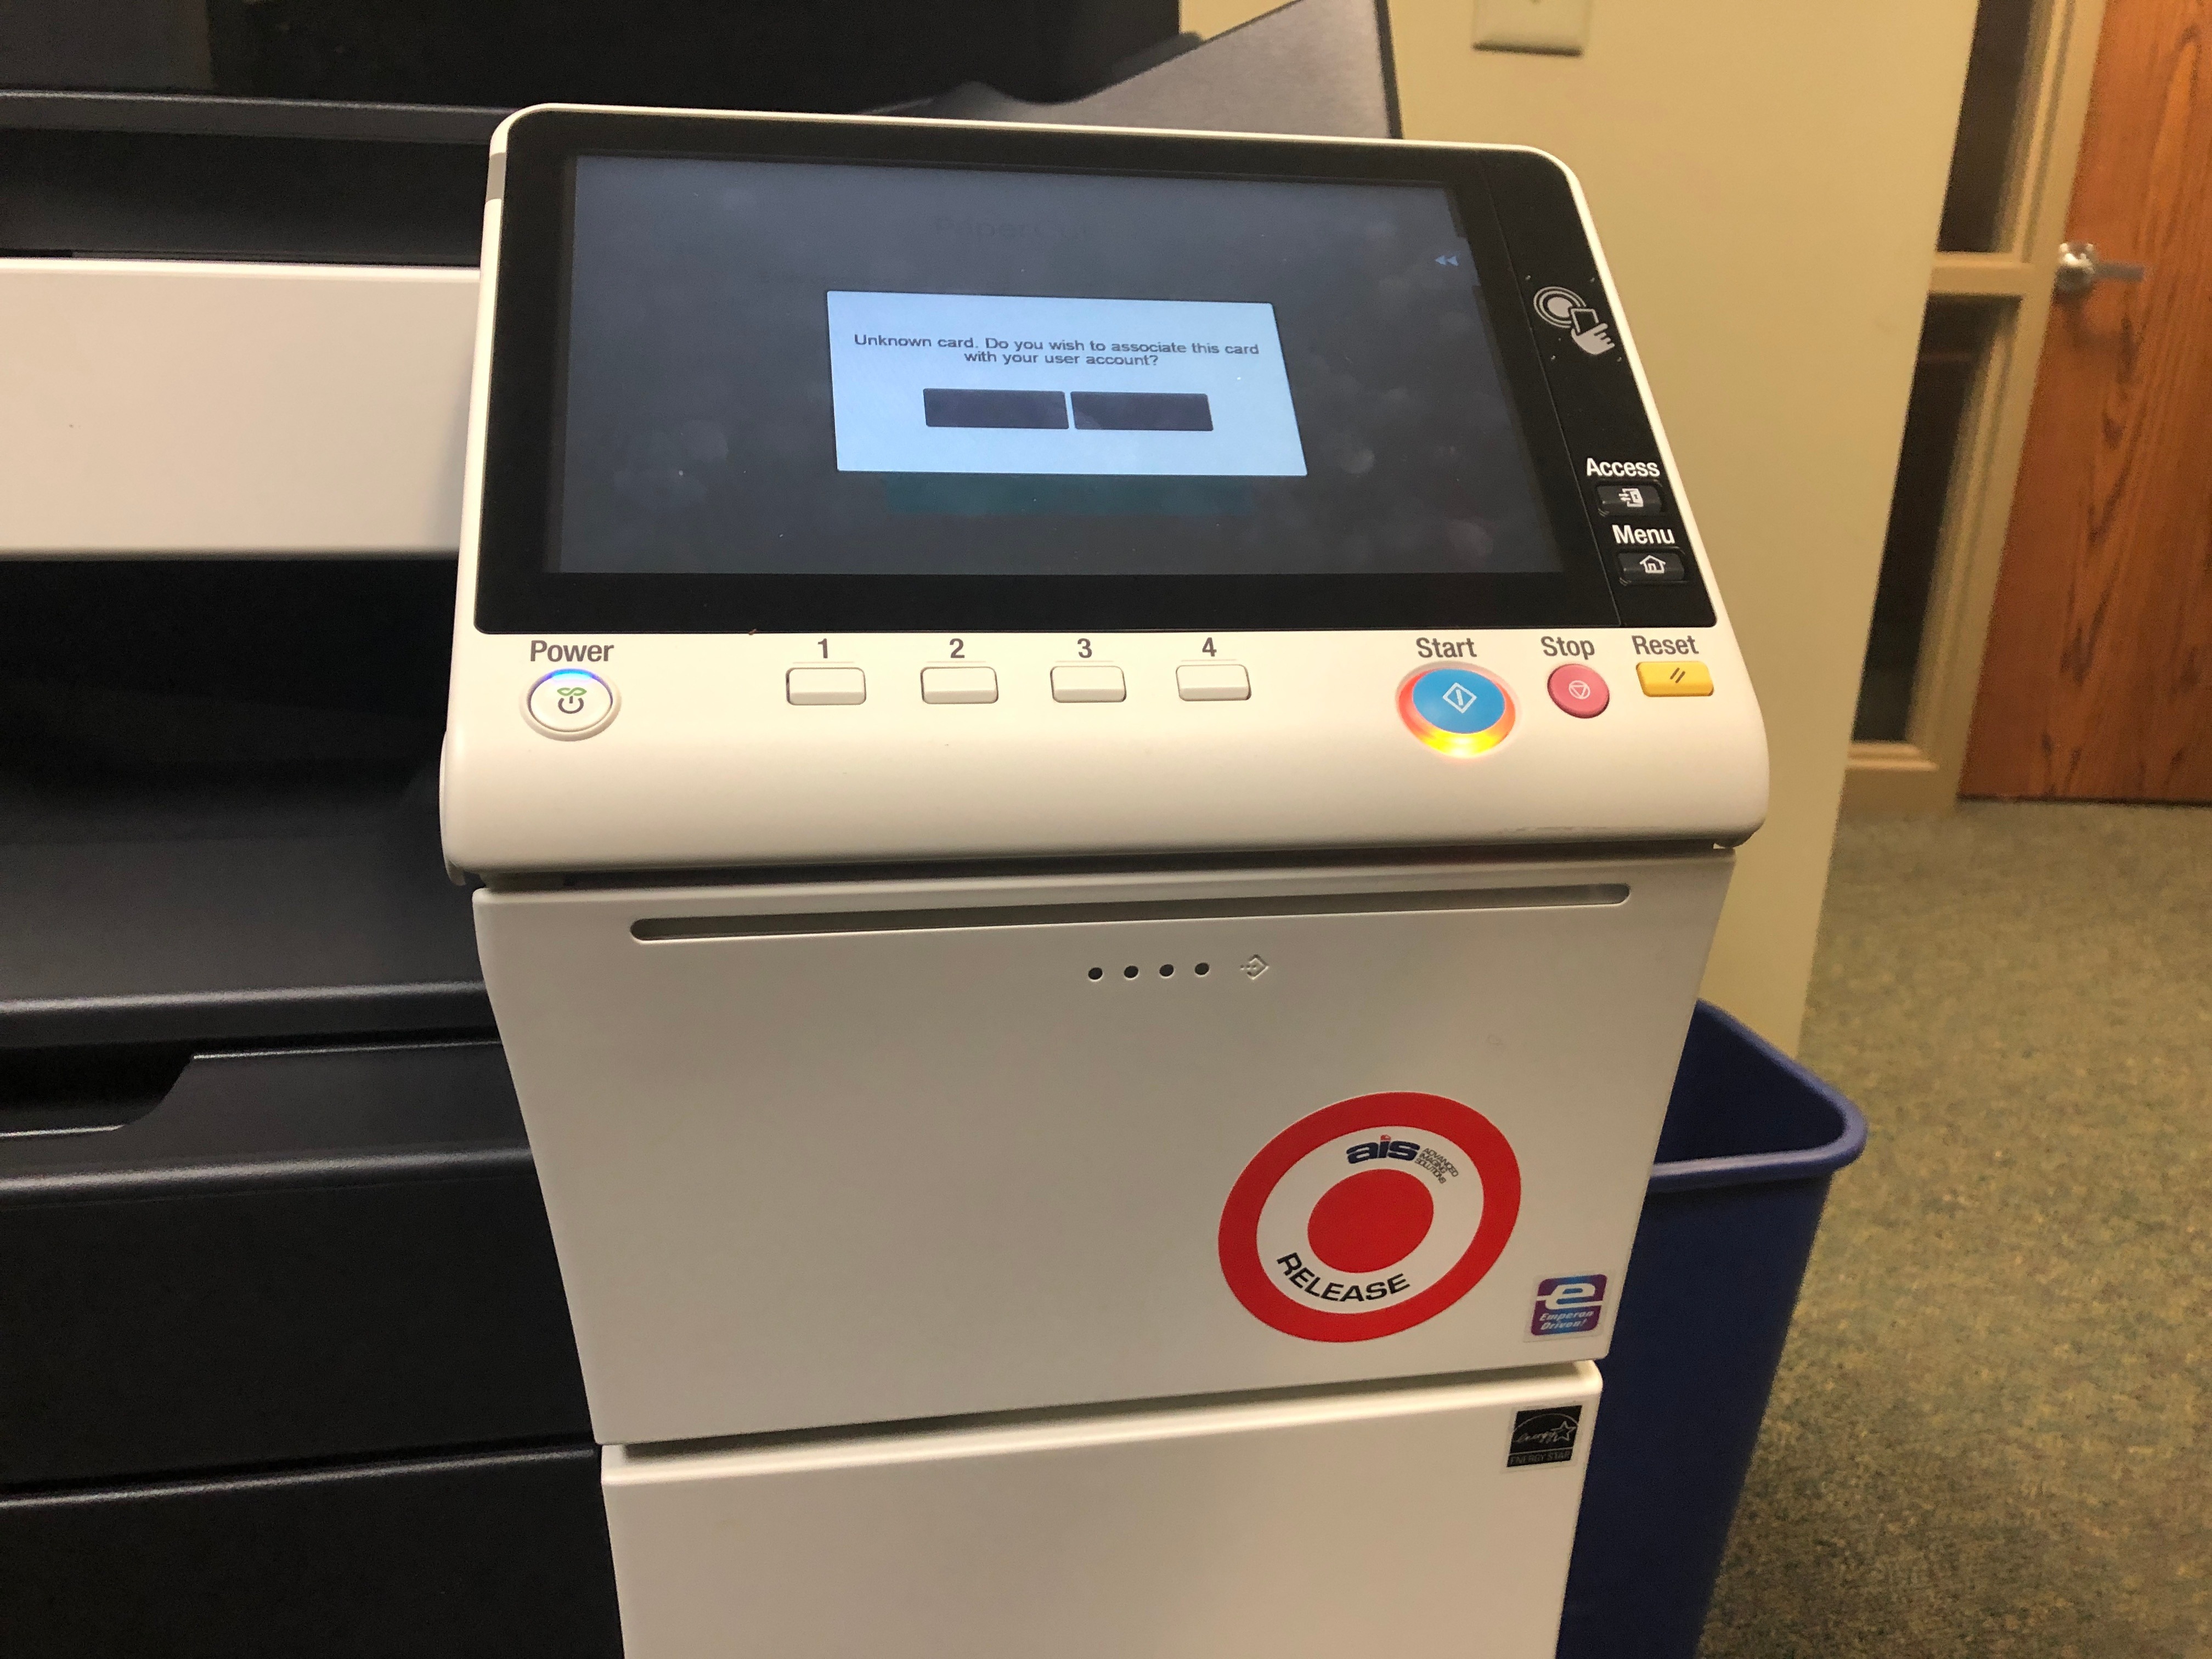
When prompted with "Unknown card. Do you wish to associate this card with your user account." select Yes and then log in with your district credentials.
Username is your username with no email address information. For example, nstrauss and NOT 123456@shakopee.k12.mn.us.
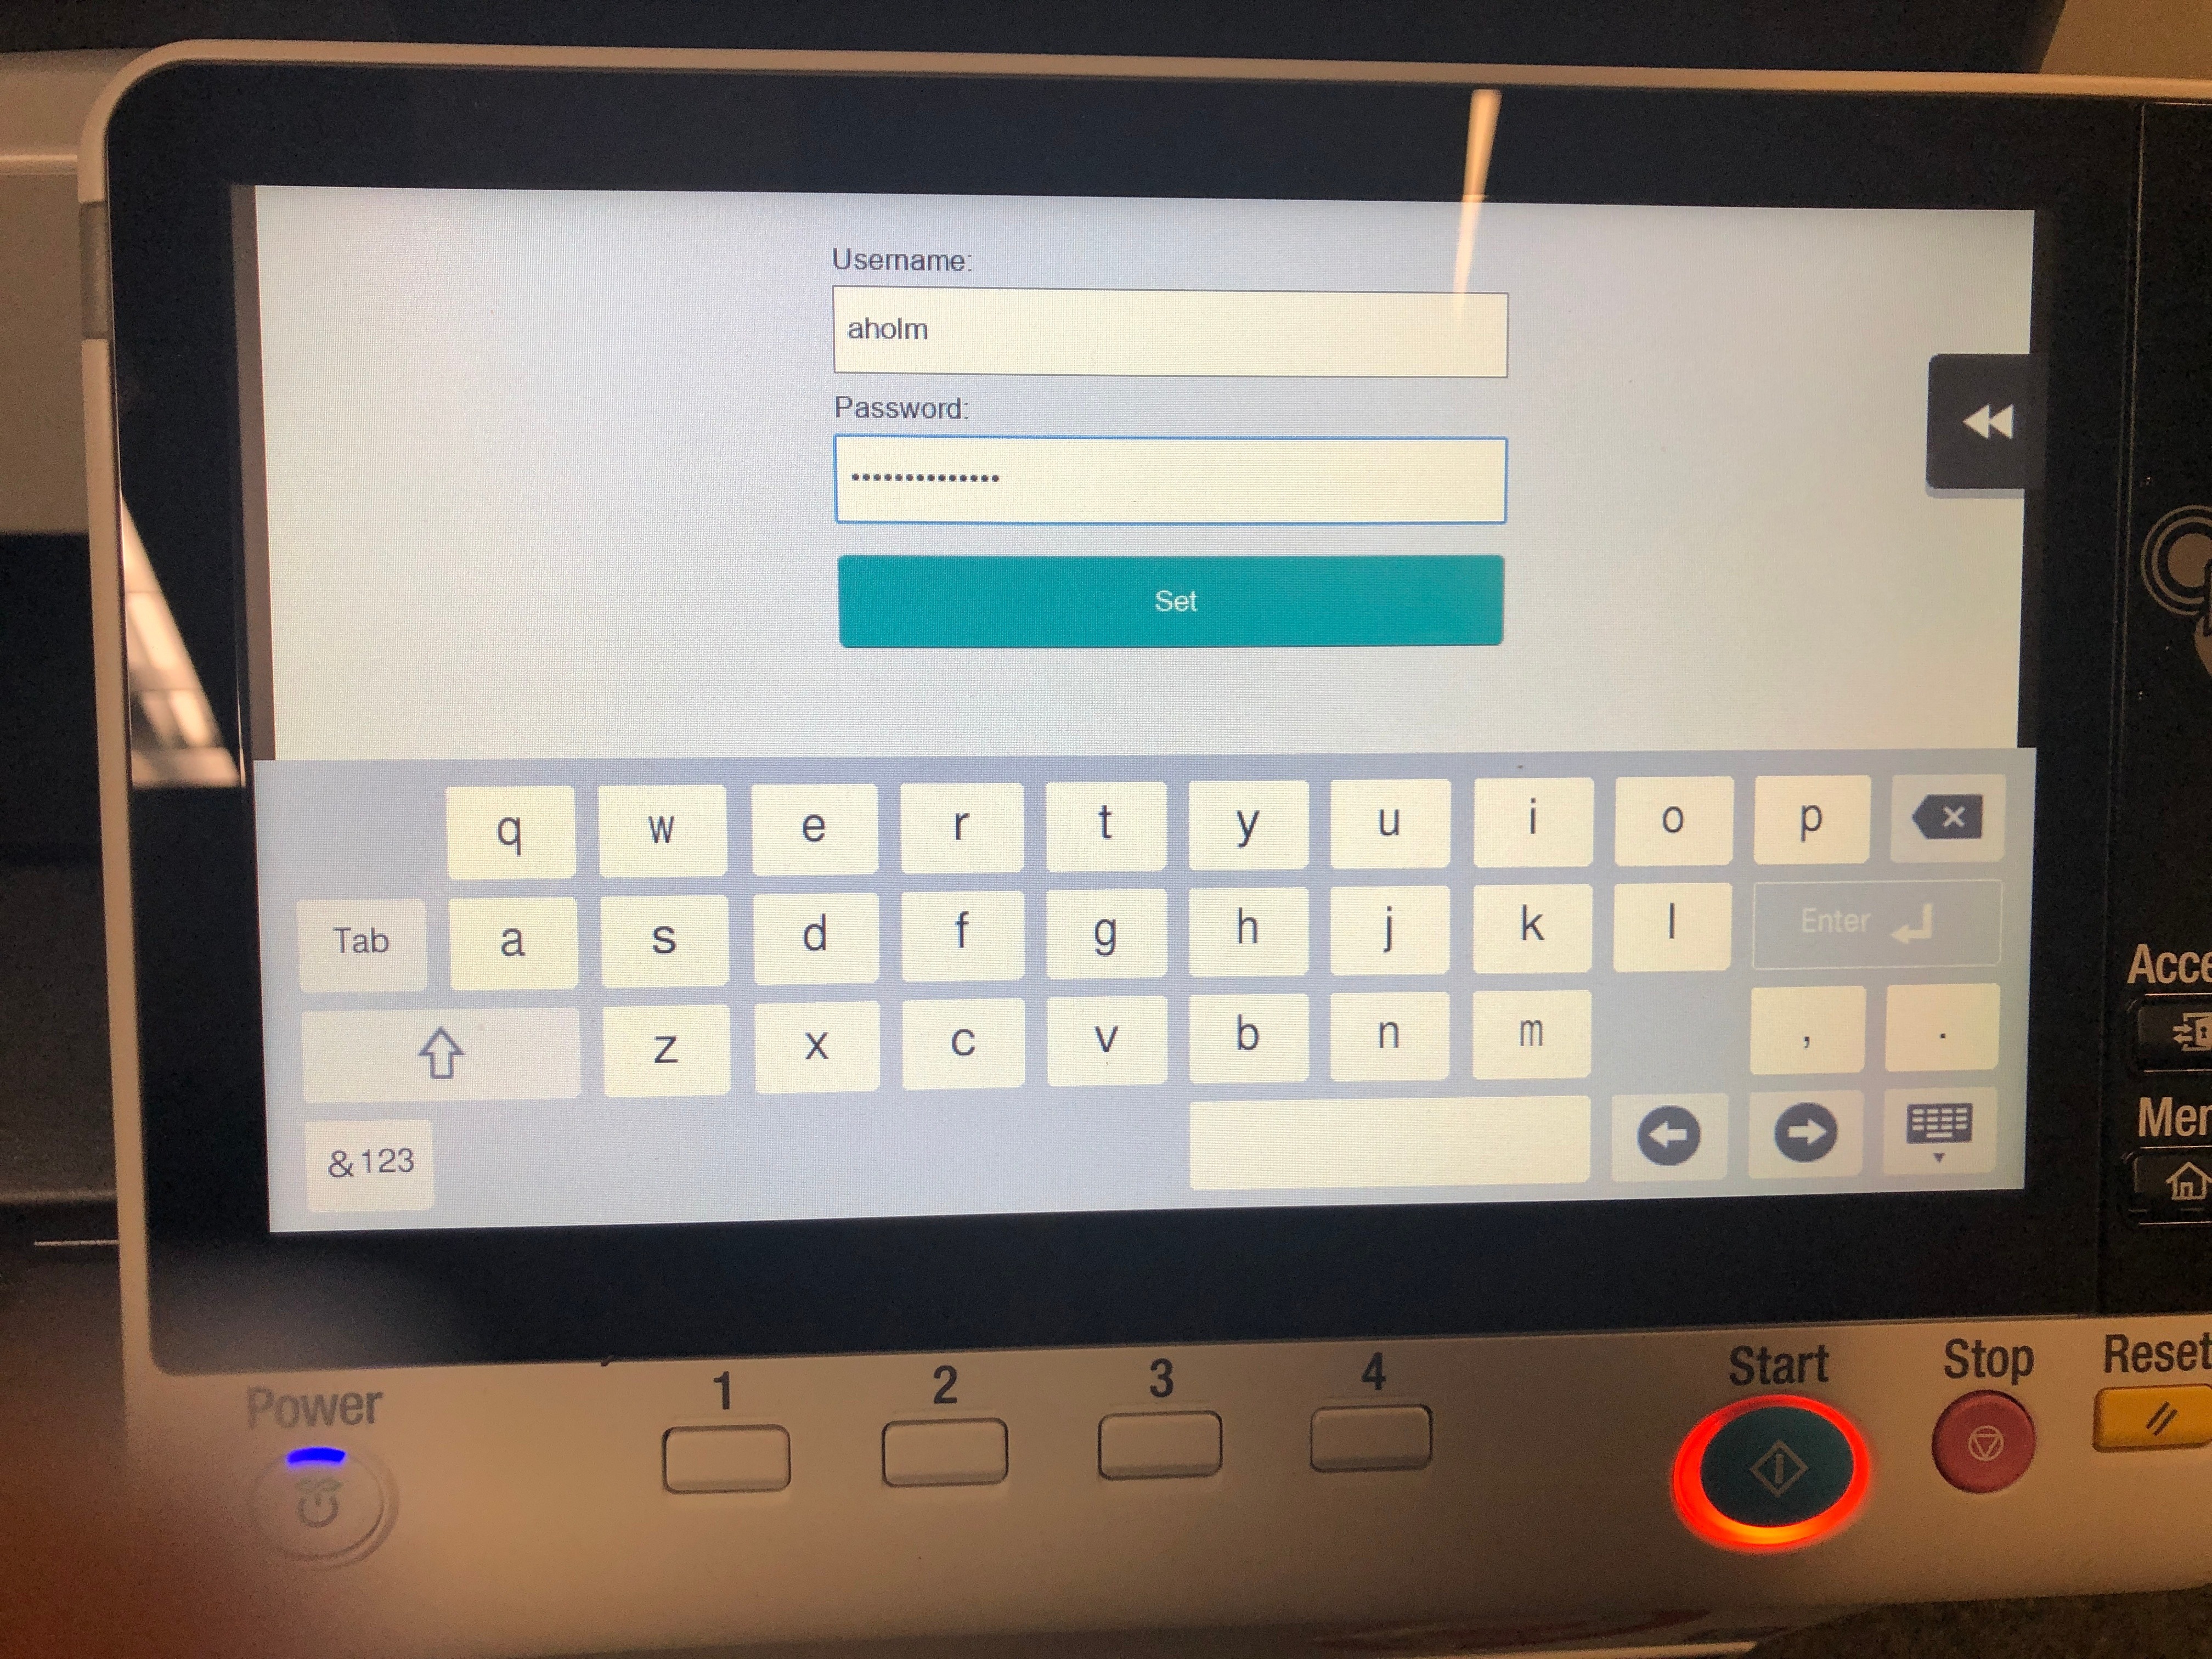
Select Set.
DeleteScan to Google Drive
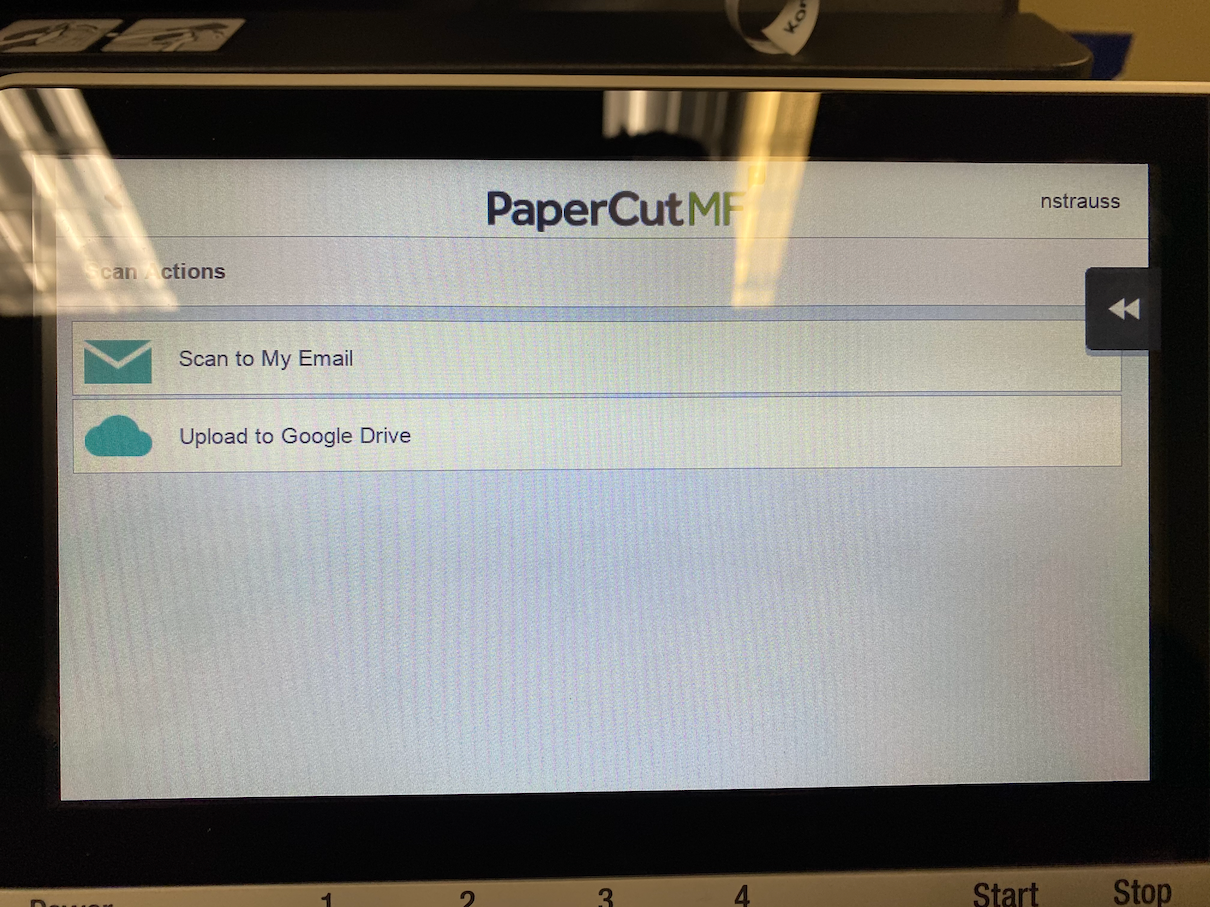
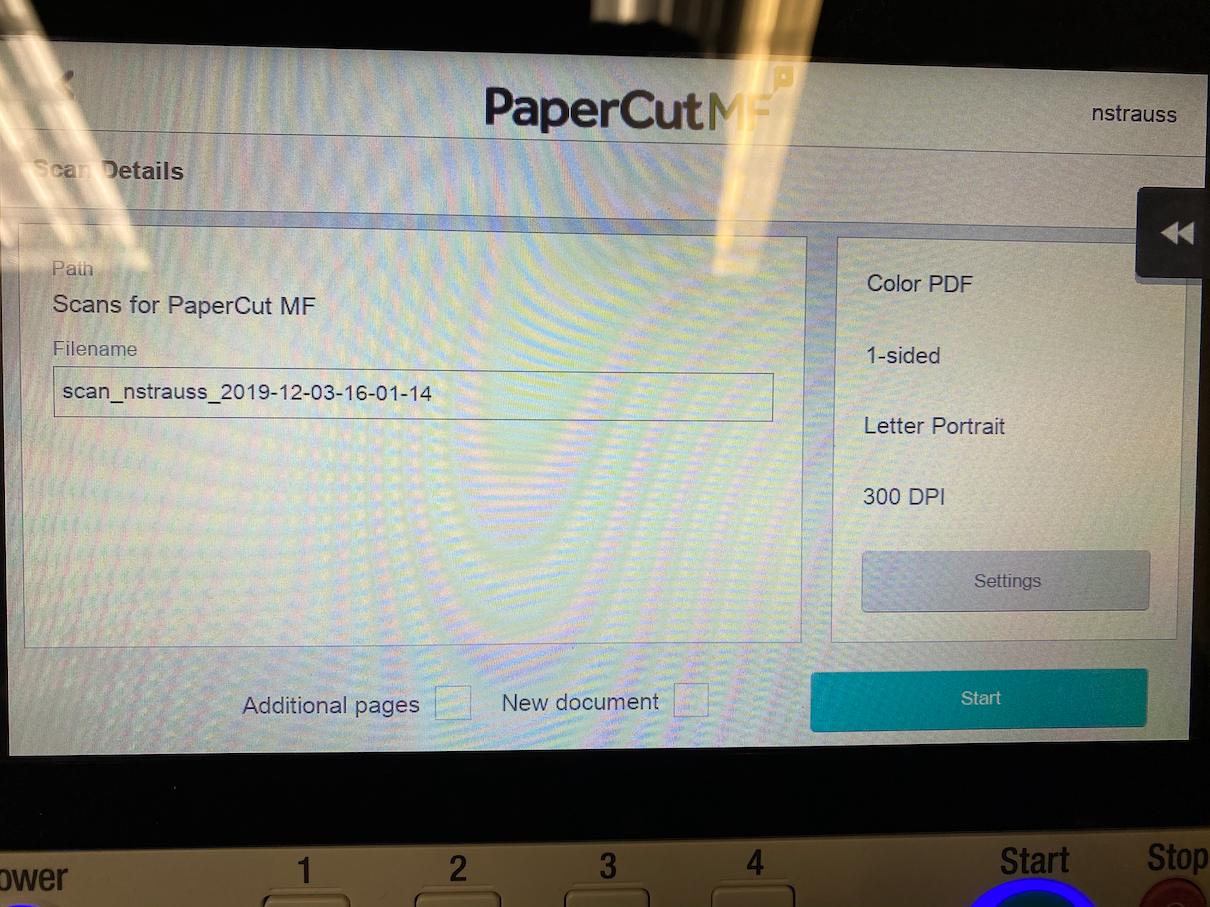
Log into the copier using your badge or username and password. Then select Scan.

Select Upload to Google Drive.
Then select Start.
The first time a scan is sent to Google Drive you will receive an email asking to link your Google account. Select Login to Google Drive in that email.

When prompted for permission select Allow.
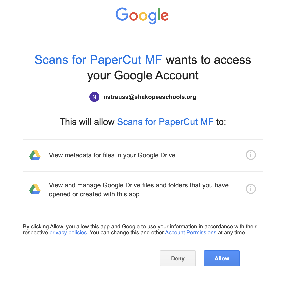
This step only needs to be done once. Scanning to Google Drive will work automatically in the future.
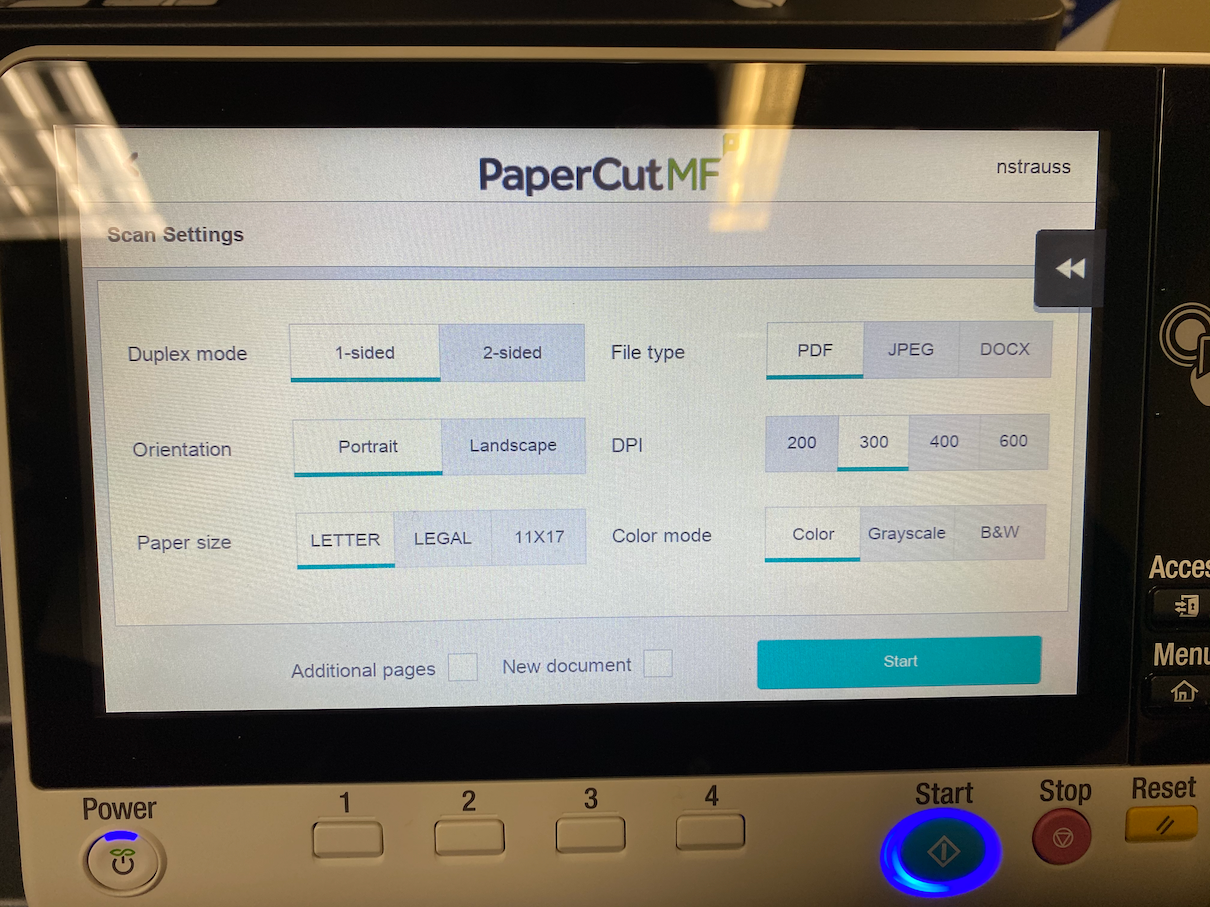
Select Settings from the scan details page to change duplex, file type, and more from the defaults.
Default Print Settings
How to adjust default setting various within the software\application being printed from.
Google Chrome
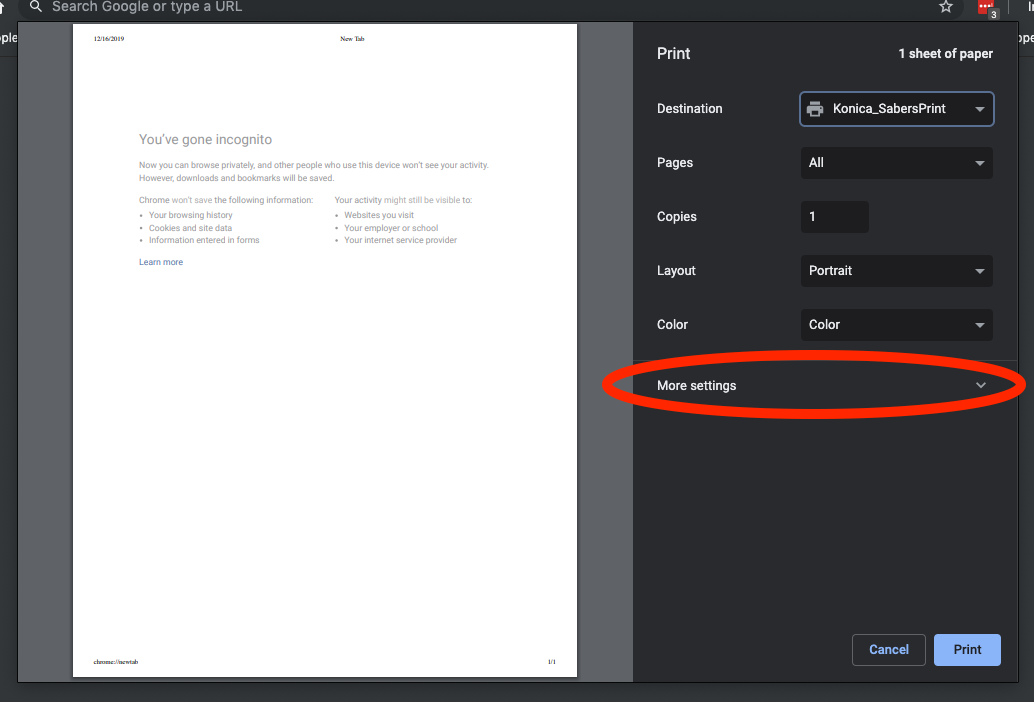
- Select Print.
- From the dialog box on the right hand side select destination as Konica_SabersPrint.
- Select Color.
Microsoft Outlook
- Select Print.
- Set printer to Konica_SabersPrint.
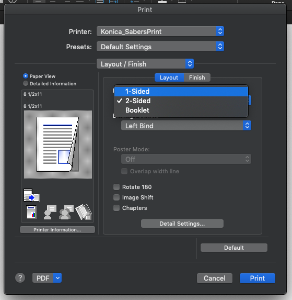
- Select Outlook dropdown
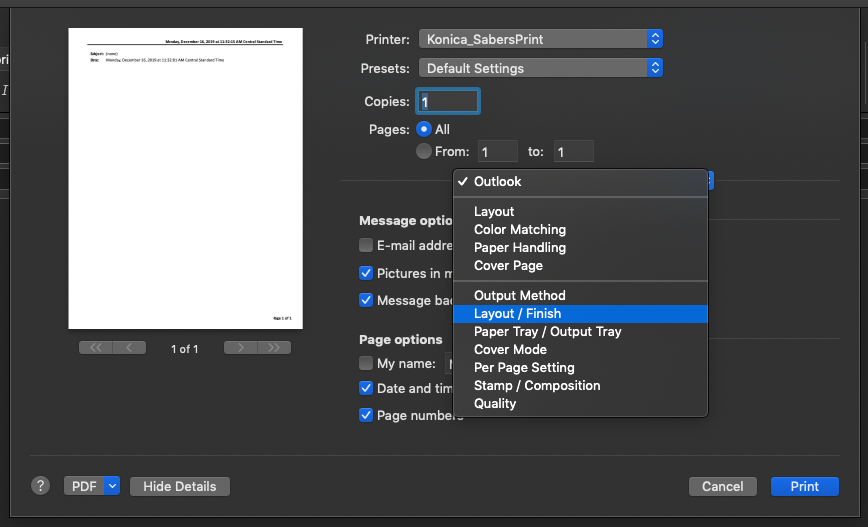
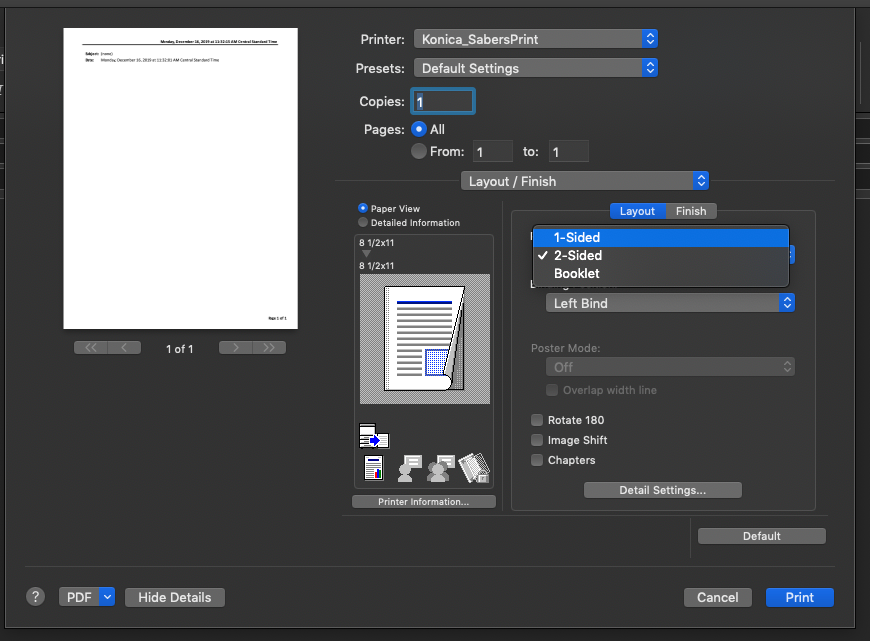
- Select Layout / Finish to change to single sided printing
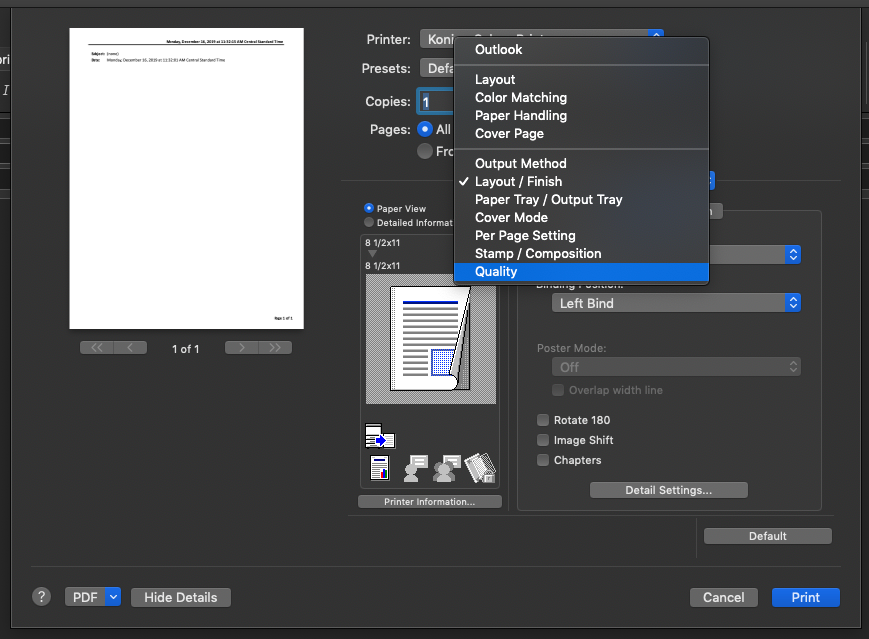
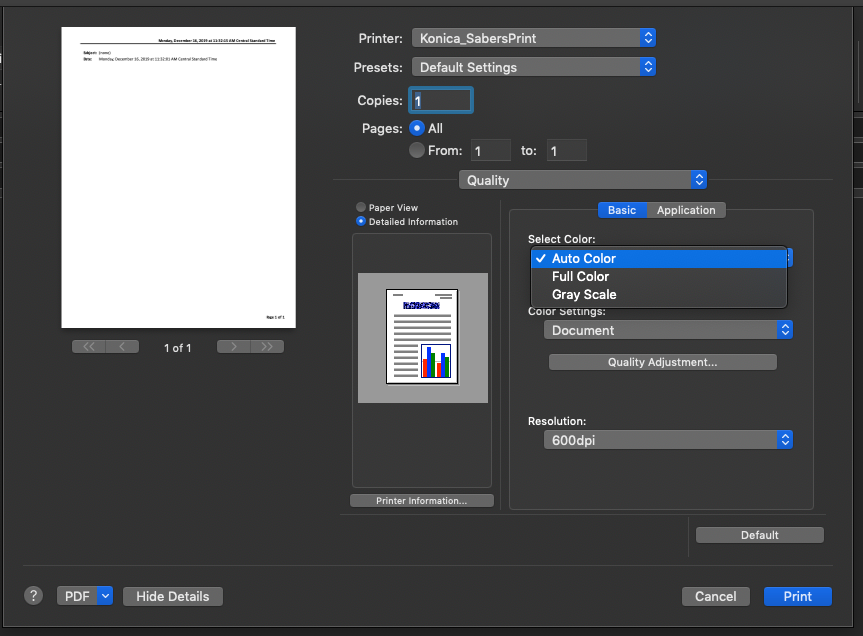
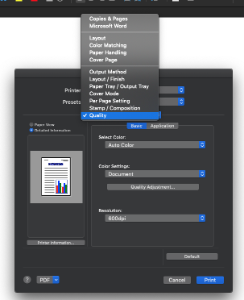
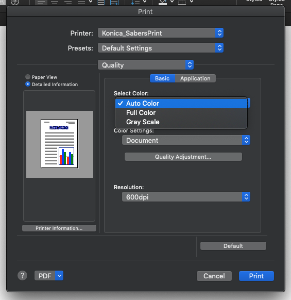
- Select Quality to change to color printing.
Microsoft Word
- Select Print
- Set printer to Konica_SabersPrint
- Select Copies & Pages dropdown
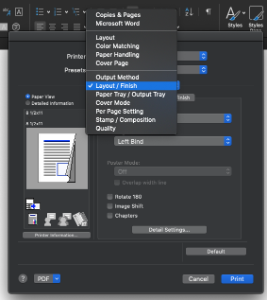
- Select Layout / Finish to change to single sided printing
- Select Quality to change to color printing
Powered by Papercut