Follow these direction to install and configure the Infinite Campus Schedule Wizard. Note steps have changed as the district no longer supports Oracle Java.
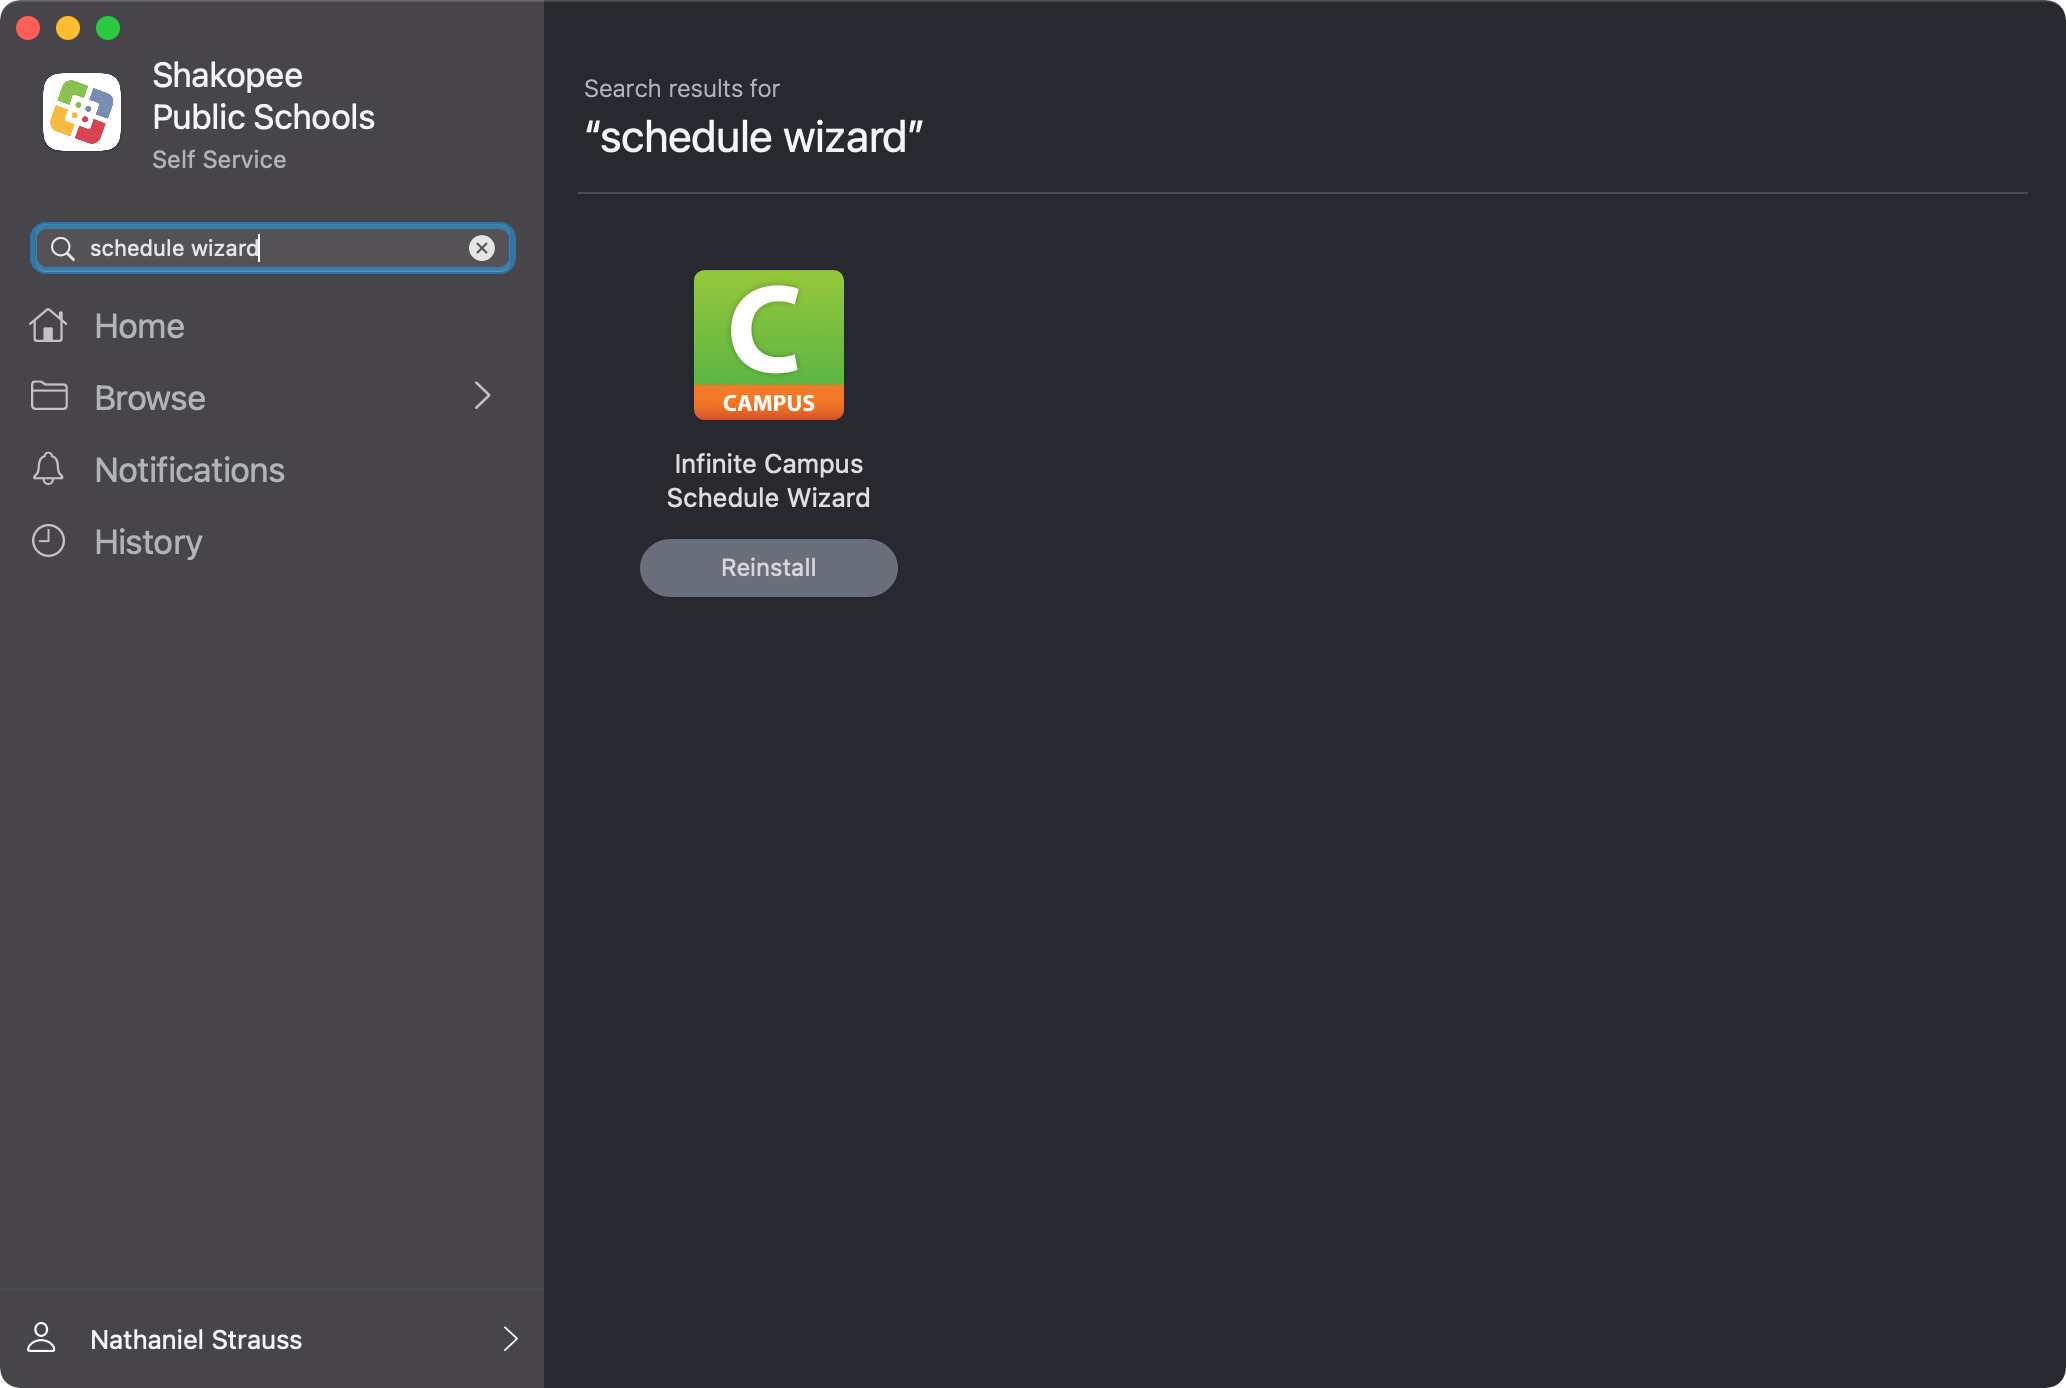
1. Install Infinite Campus Schedule Wizard through Self Service.
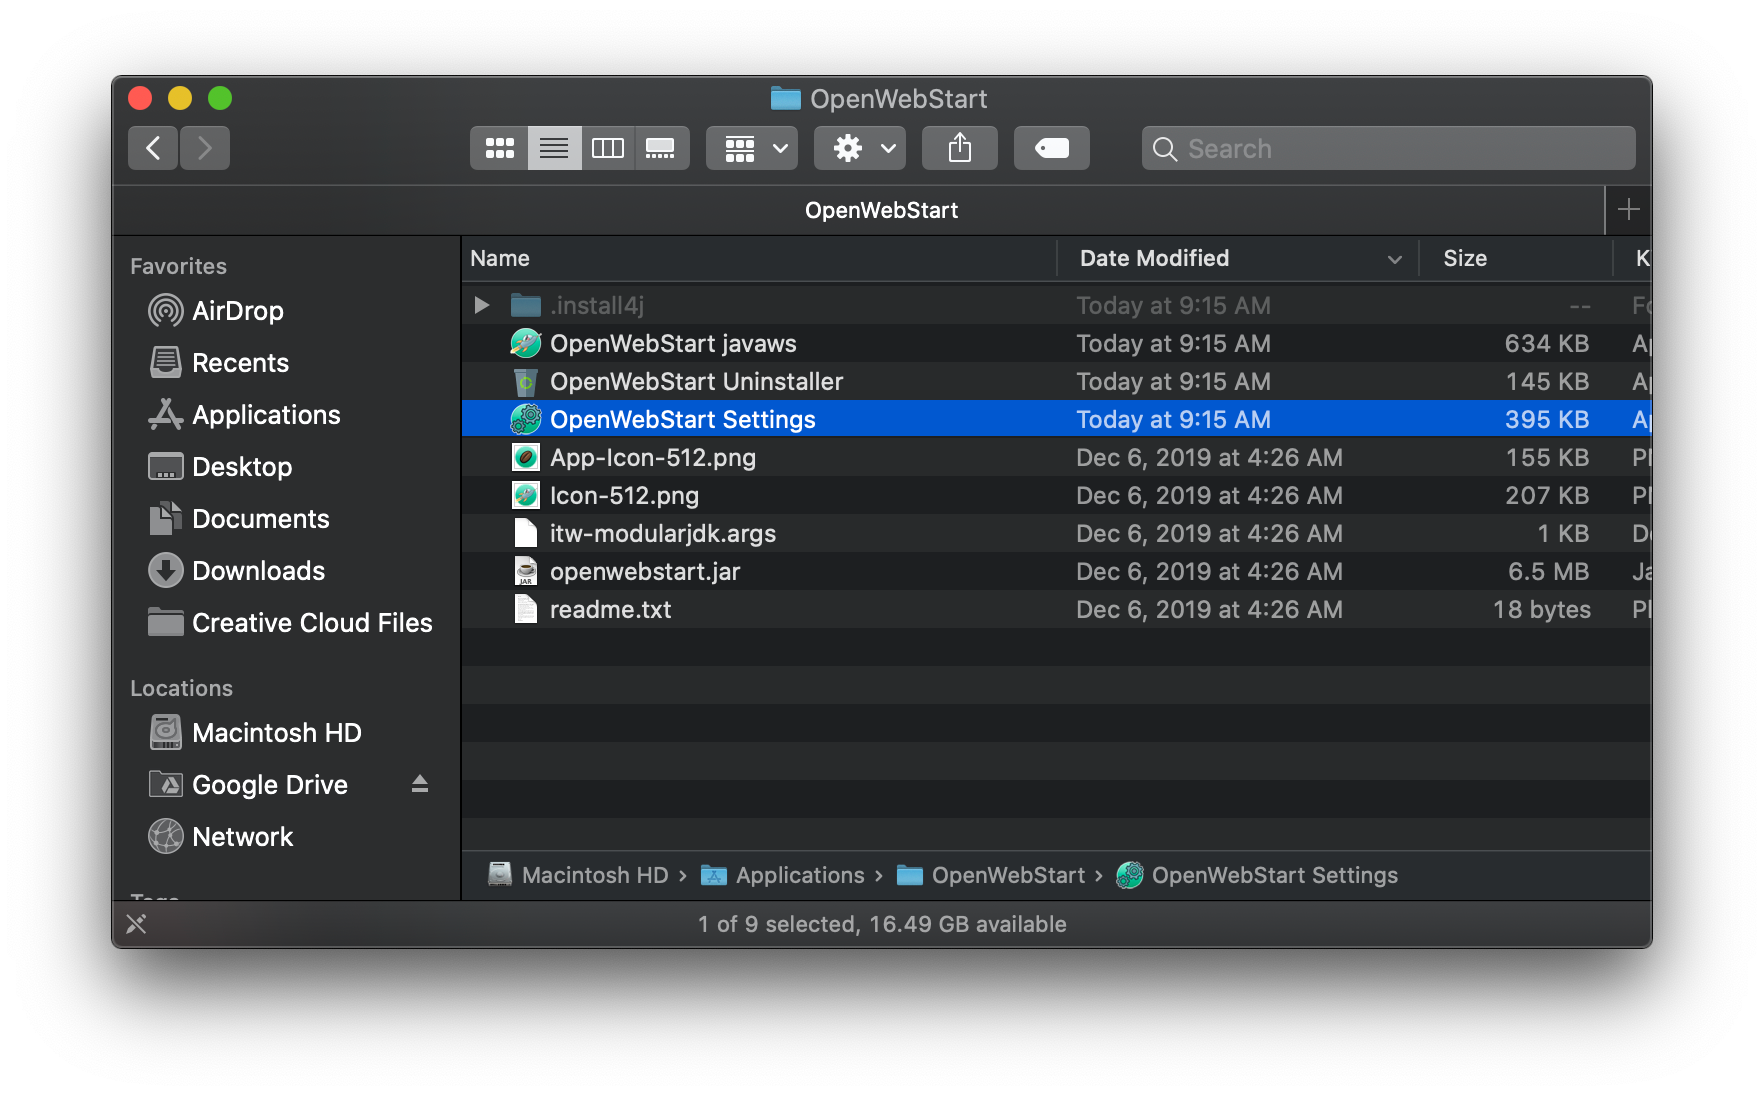
2. OpenWebStart Settings will automatically open. If not, open OpenWebStart Settings from /Applications/OpenWebStart.
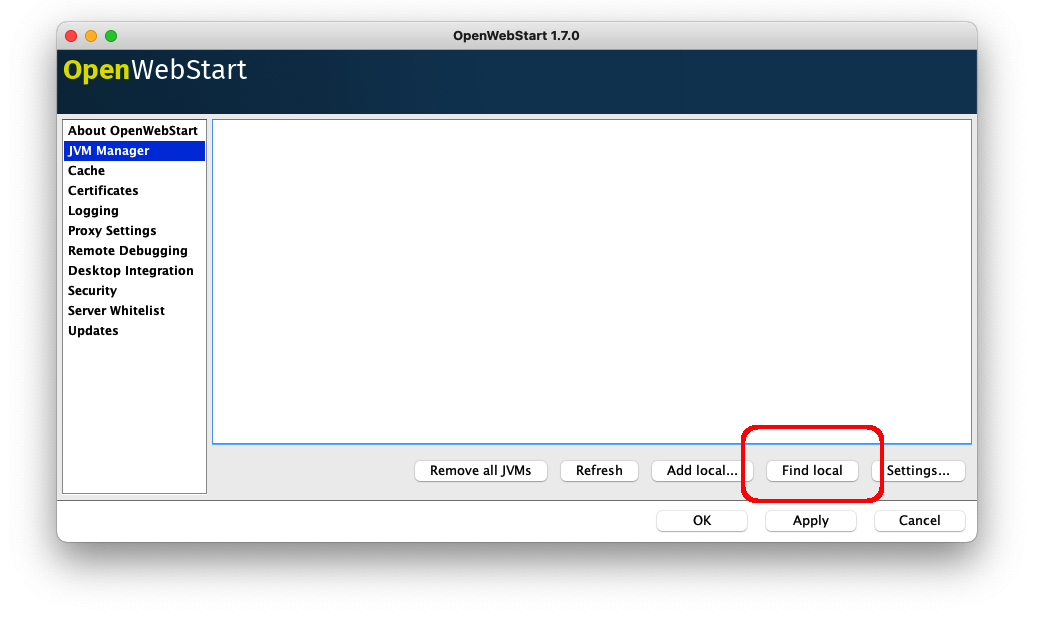
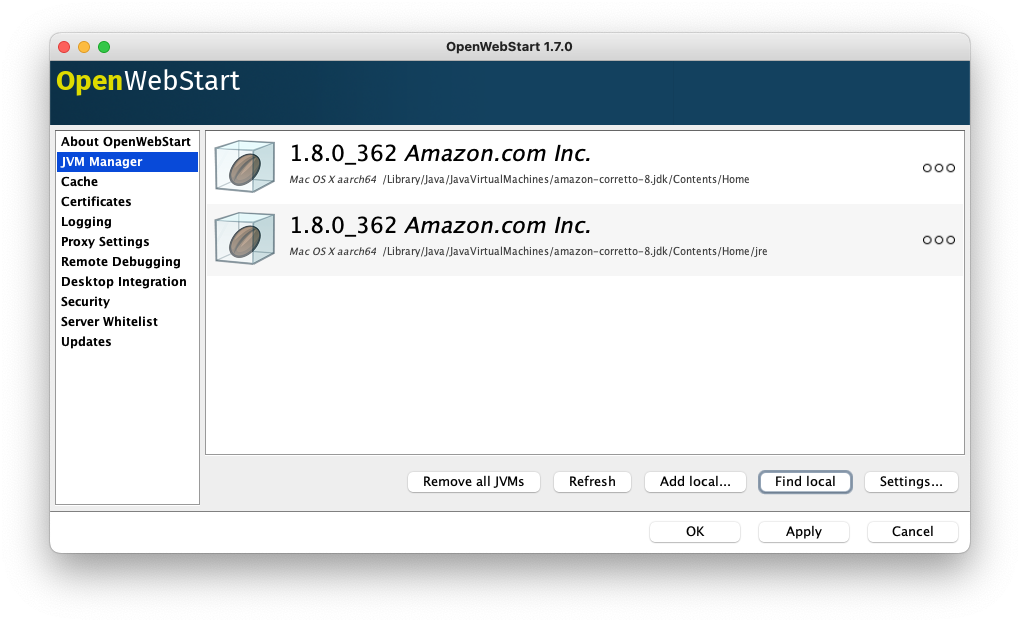
3. Go to JVM Manager and select Find local. Afterwards a JVM like in the screenshot below will appear. Select Apply and then OK to close settings.
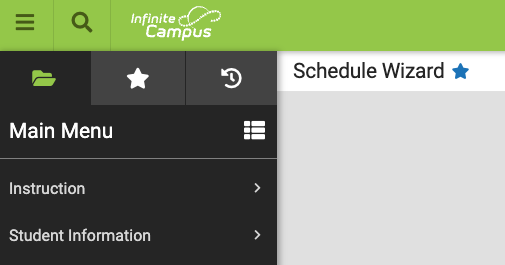
4. Navigate to Infinite Campus.
5. Ensure that you are on the New Look version of Campus.
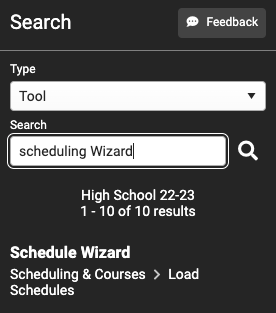
6. Go to Search > Tools and search for Scheduling Wizard. Click the first result, Scheduling & Courses > Load Schedules.
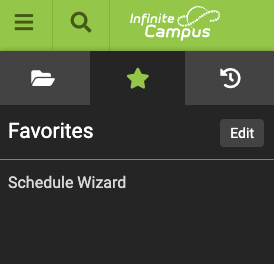
7. Click the Star next to Scheduling Wizard to add it to your Infinite Campus favorites, so you can easily access it in the future.
8. Click Launch and a file named Shakopee.jnlp will download.
You need to download a new Shakopee.jnlp file every time you want to use Infinite Campus Schedule Wizard.

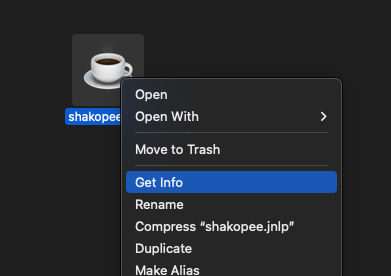
9. Navigate to your Downloads and find the file. Hold down control, click the file, and then click Get Info.
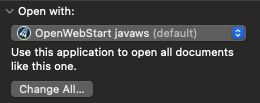
10. Expand Open With and change that to OpenWebStart javaws. Then click Change All. This will allow OpenWebStart to open all .jnlp files. You only need to do this one time per computer, skip this step in the future.
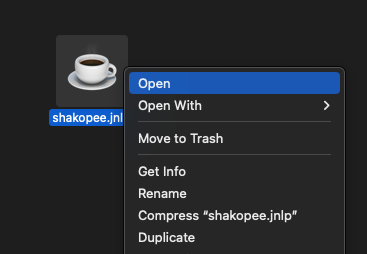
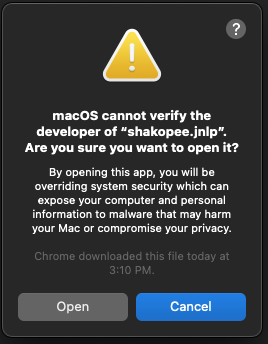
11. Hold down control, click the file, then press Open. Click Open on the next prompt.
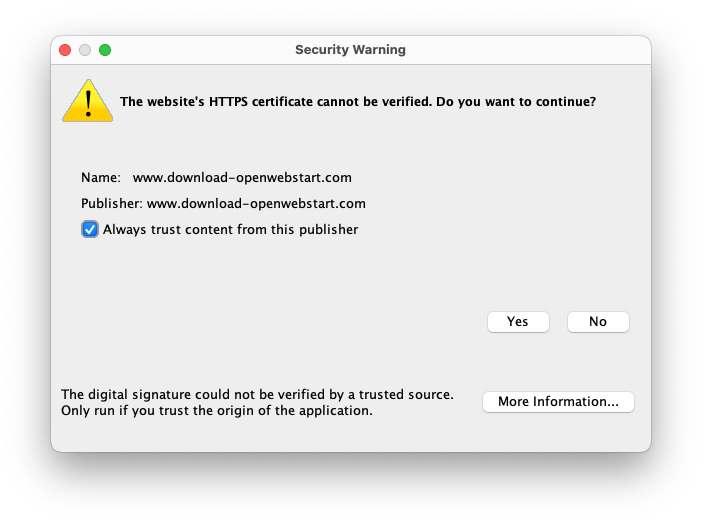
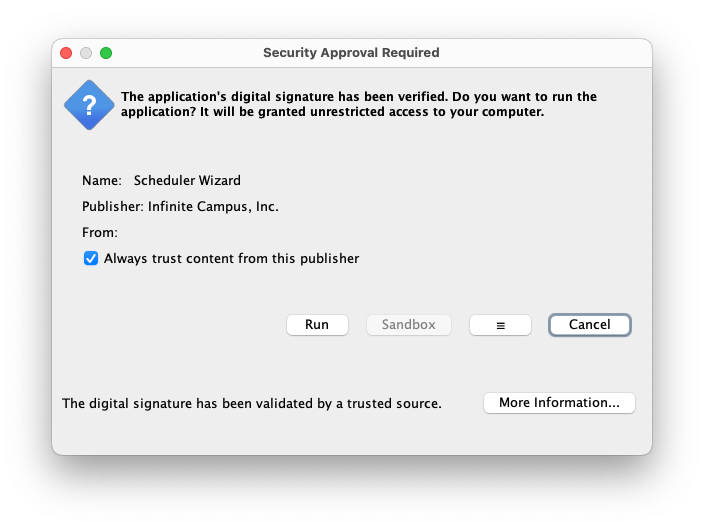
12. Two windows may open like these. Put a checkmark next to Always trust content from this publisher and then press Yes/Run
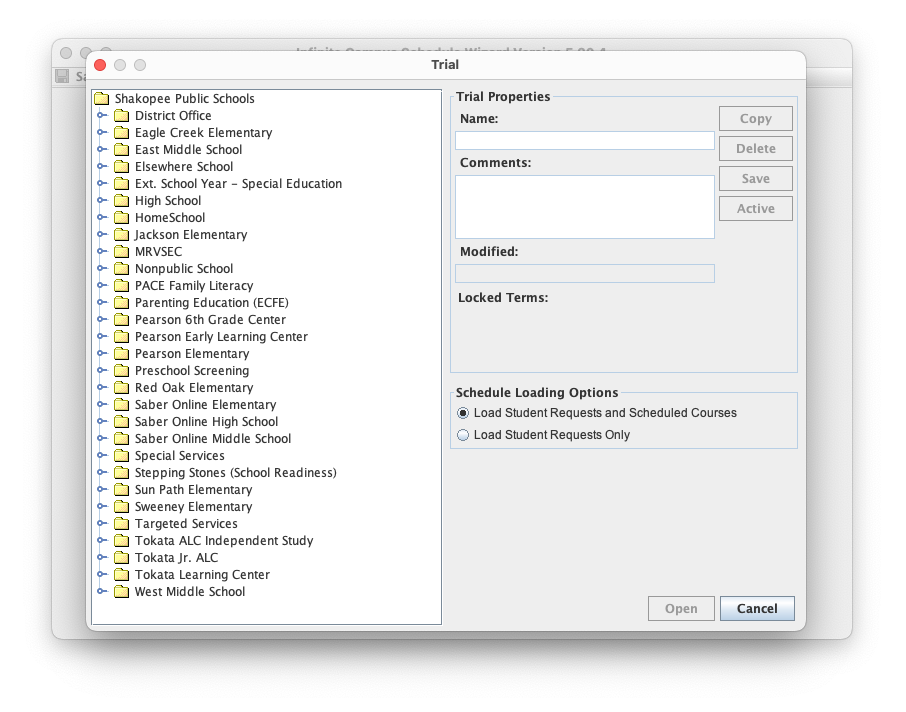
13. Infinite Campus Schedule Wizard will then be running. Once this is closed, you then need to restart at step 8 to re-open Infinite Campus Schedule Wizard. (You can skip steps 9 & 10 if done already)