
FAQ
What is mailbox delegation?
Similar to having an assistant that helps you manage your incoming paper mail, another person, known as a delegate, can receive and respond to email messages and meeting requests and responses on your behalf. You can also grant the delegate additional permissions to read, create, or change items in your Microsoft Exchange Server mailbox.
Who should use delegation?
This is not generally recommended except for administrative assistants or similar circumstances.
What does Delegate Access do?
Delegate Access goes beyond just sharing access to your folders. Delegates are granted additional permissions, such as creating email messages or responding to meeting requests on your behalf.
Additional details here: Microsoft - What does Delegate Access do?
What permission levels are there?
Reviewer
With this permission, the delegate can read items in your folders.
Author
With this permission, the delegate can read and create items, and change and delete items that he or she creates. For example, a delegate can create task requests and meeting requests directly in your Task or Calendar folder and then send the item on your behalf.
Editor
With this permission, the delegate can do everything that an Author has permission to do and additionally can change and delete the items that you created.
Assigning a Delegate
Granting access
These steps are for granting or giving someone (Delegate) access to your mailbox.
Select Outlook platform\version to continue.
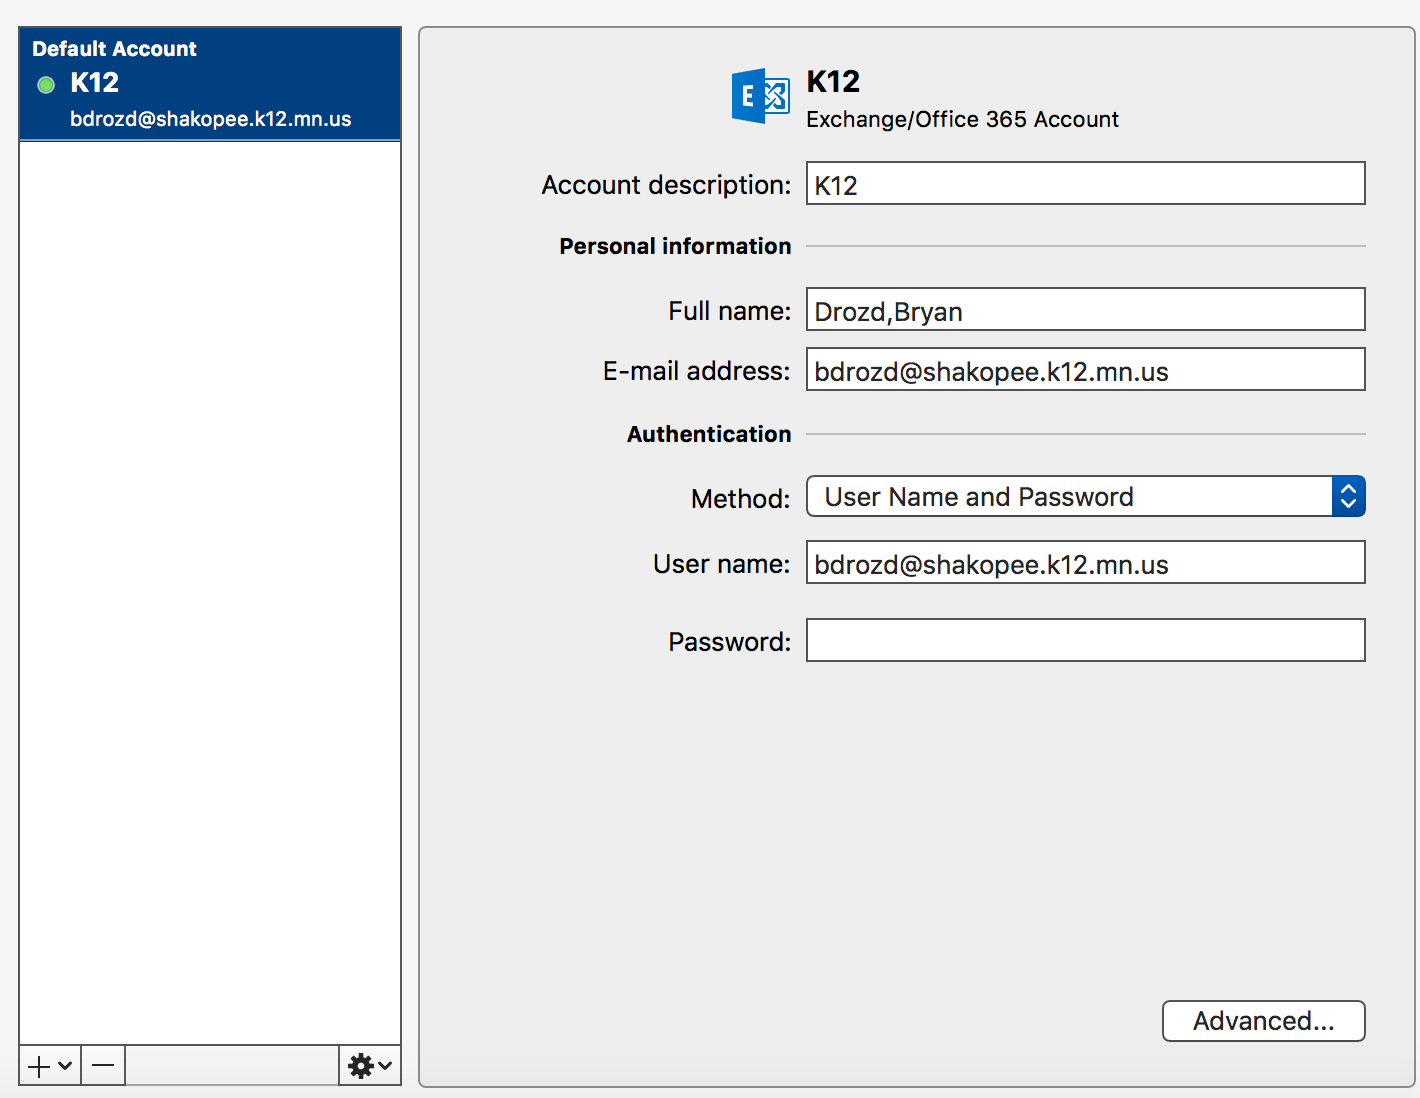
In Outlook, go to the Outlook menu and select Settings.

Click on Accounts (Top Row), click on the account you want to add it to, and then click Delegates & Sharing


Click on the + sign.

Type in a email address to search for the person. Once found, select the desired entry and click Add.

Select desired permission to delegate.

Additional Resources:
- Options for sharing and delegating folders in Outlook for Mac
- Share your calendar in Outlook for Mac
Click OK to complete the process.
Launch Outlook and select the File tab.
Next, select Account Settings. A drop-down menu displays.

Select Delegate Access from the drop-down menu. The Delegates screen displays.

On the Delegates screen, select the Add... button. The Add Users screen displays.

- Locate the name of the person to which you want to grant delegate access.
- Highlight their name by selecting it with your mouse cursor.
- Select the Add -> button.
- Select the OK button.
The Delegate Permissions screen displays.

-
Select the appropriate permissions for the person to whom you are granting delegate access.
Additional Resources:
When you are finished, select the OK button. The Delegates screen displays.

- Select the OK button.
Adding Shared Mailbox (Delegated Mailbox) to Outlook
Accessing shared mailbox
These steps are for accessing a mailbox you have been given permission to (Delegated).
Select Outlook platform\version to continue.
In Outlook, go to the File, Open and Shared Mailbox.

Search for the shared mailbox you are part of (essentially you have permission to add/view). And then Add.

Your Shared Mailbox should appear on the left pane.

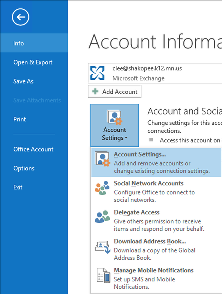
In Outlook, Click on the File menu.

Click Account Settings then Account Settings...
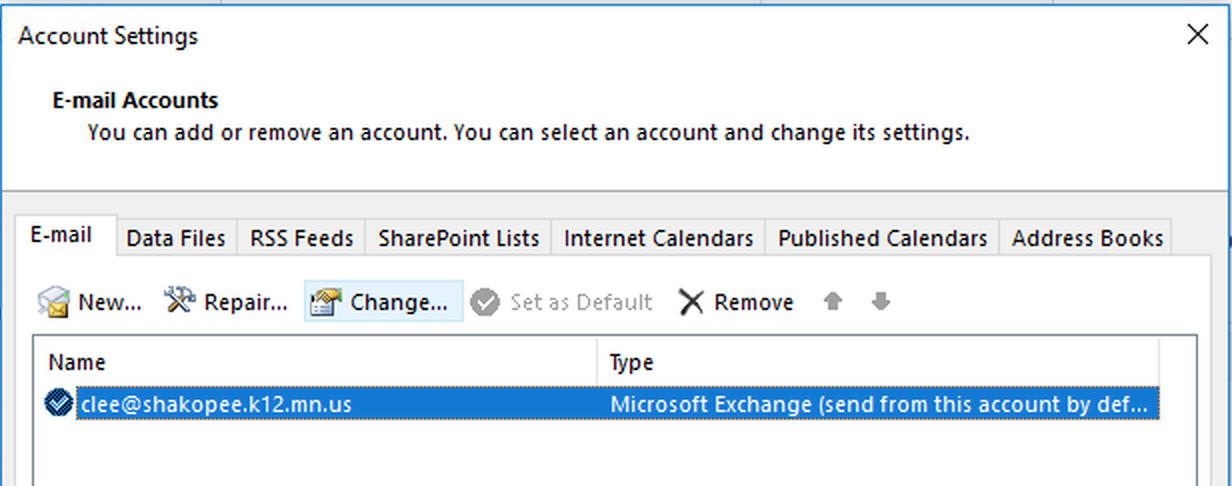
Select account to edit and click Change
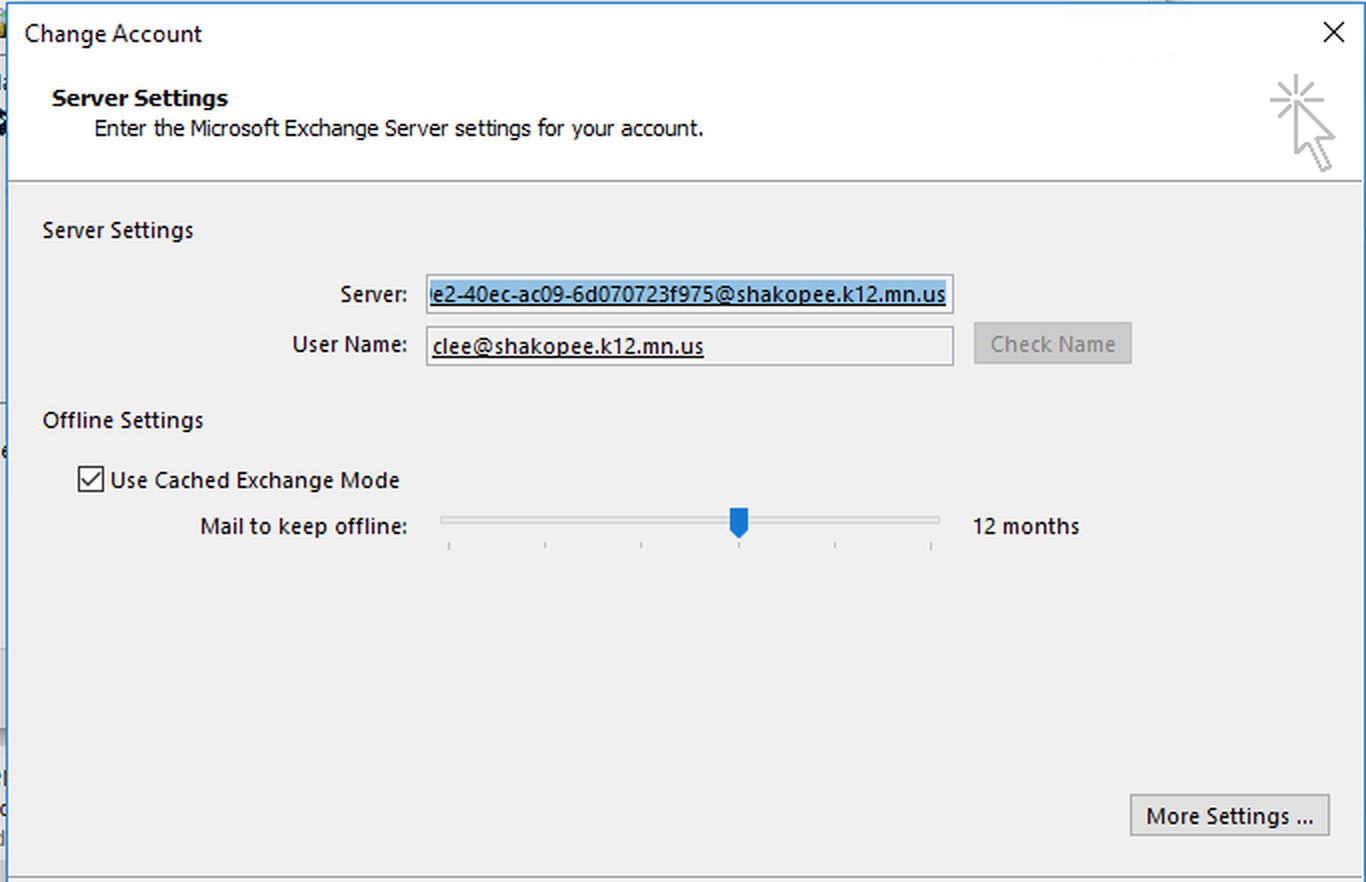
From Change Account window click More Settings...
Click Advanced tab. Click Add.
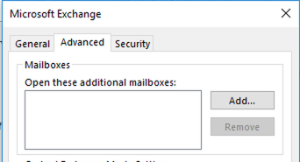
Enter email address of mailbox to be delegate for and click OK

Click OK until back to normal Outlook window.
May need to close and re-launch outlook for mailbox to load.
Revoking Delegate
Write your initial question/sentence to troubleshoot
Click on your account (upper left corner) and then click Advanced (lower right corner).
Go to the Delegates section.
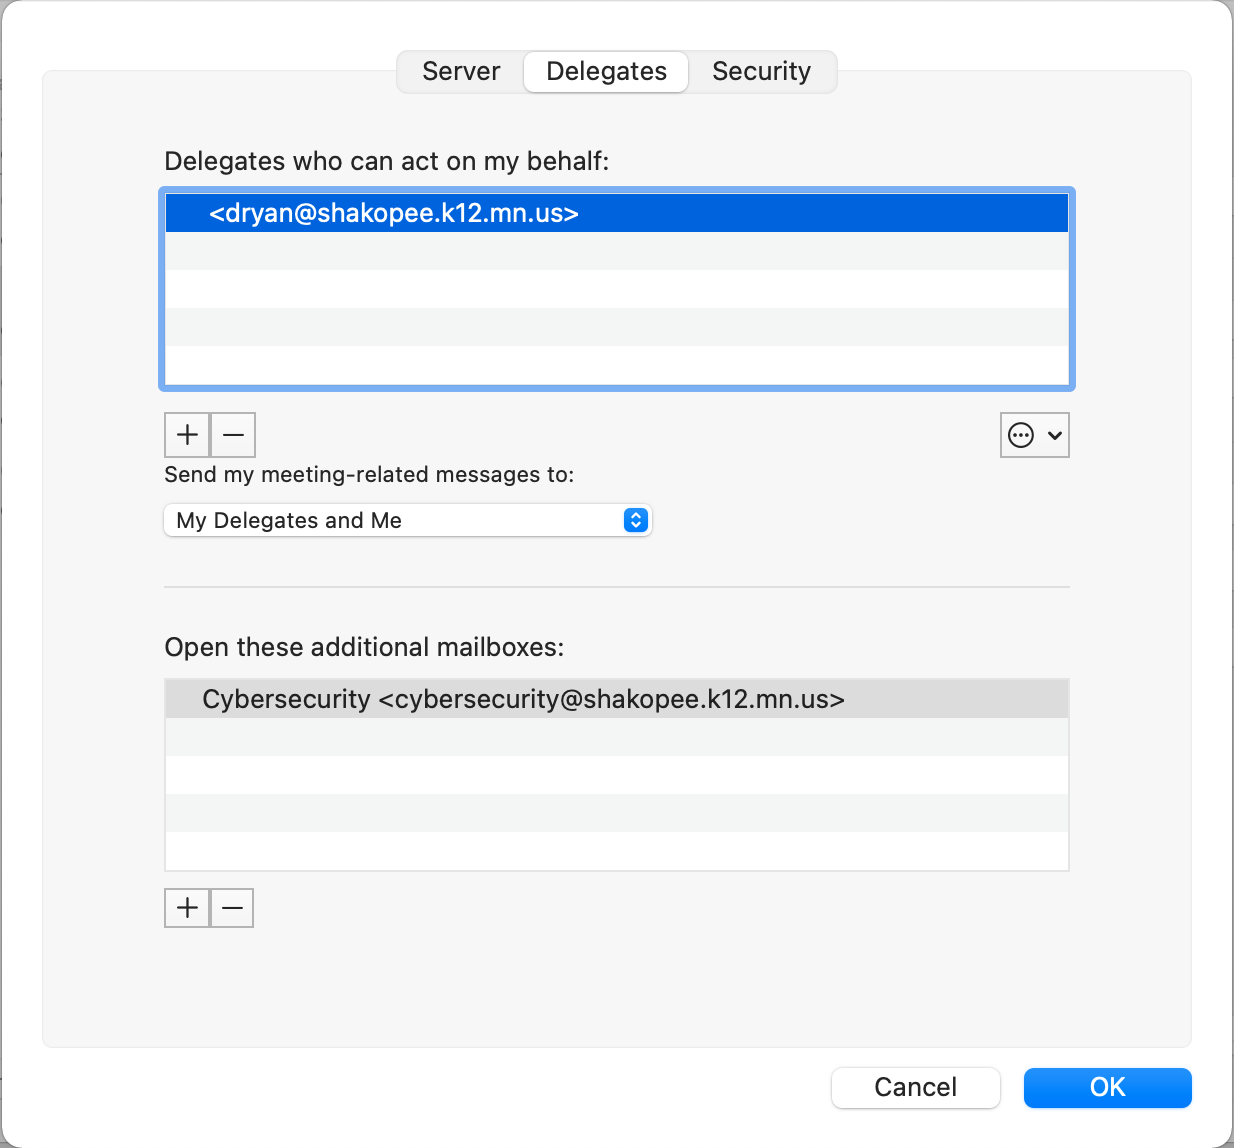
- Highlight the name of the delegate you want to remove.
- Select the Remove button (-).
- The name of the delegate is removed from the Delegates screen.
- Select the OK button. The Delegates screen closes.
Next, select Account Settings. A drop-down menu displays.

Select Delegate Access from the drop-down menu. The Delegates screen displays.

- Highlight the name of the delegate you want to remove.
- Select the Remove button. The name of the delegate is removed from the Delegates screen.
- Select the OK button. The Delegates screen closes.