
Frontline Account
Setting Up A Frontline Account
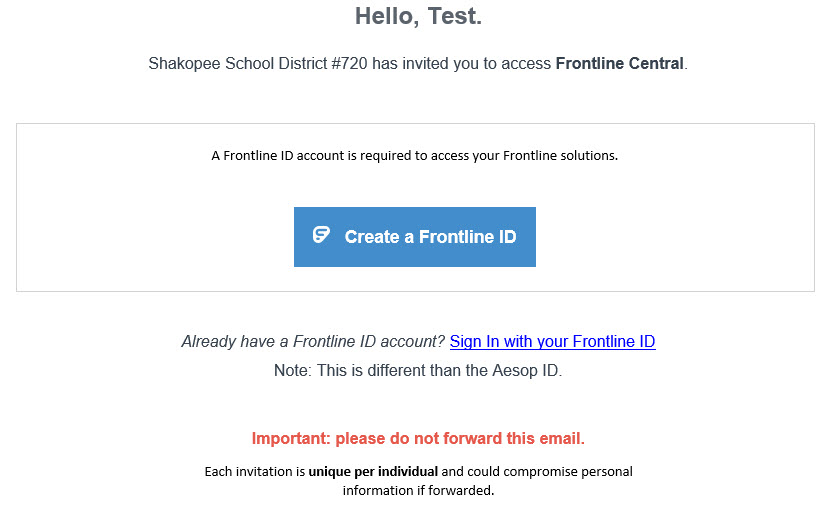
Human Resources manage and create accounts. After your account is generated, you should receive an Account Access invitation email from Frontline Education <notifications@mail1.frontelineed.com>.
**Please check your Spam/Junk Email folder prior to contacting HR if you did not receive the email
If you did not receive the invitation email, please contact HR
Account Access emails expire after 30 days, and are personalized for each individual user. Please contact HR to request a new invite for expired links
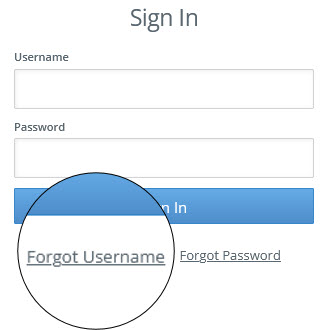
Retrieve Frontline Username
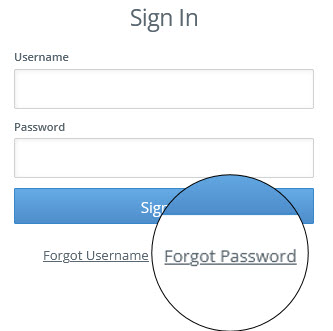
From the sign-in page > Click Forgot Username
Enter the Email address used to set up account.
Click Email username.
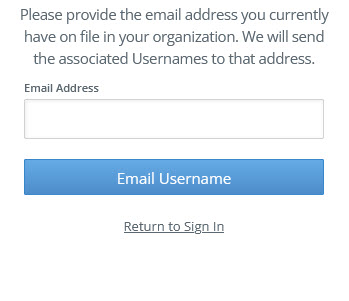
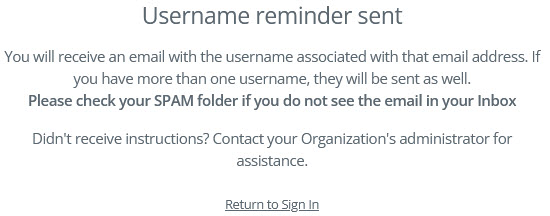
Frontline will send an Email containing the Username
**Please check your Spam/Junk Email folder prior to contacting HR if you did not receive the email
Retrieve Frontline Password
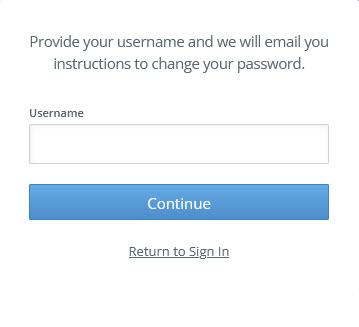
From the sign-in page > Click Forgot Password
Enter Username used to set up account.
Click Continue
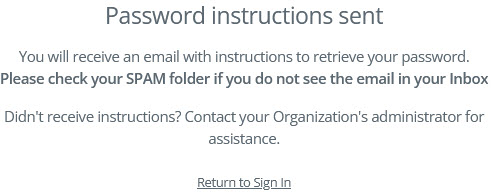
Frontline will Email Instructions to retrieve password
**Please check your Spam/Junk Email folder prior to contacting HR if you did not receive the email
Absence Management
Creating an Absence
Date Selection: When selecting your absence timeframe, click on the desired date within the calendar. (The system will highlight your selection in blue.)
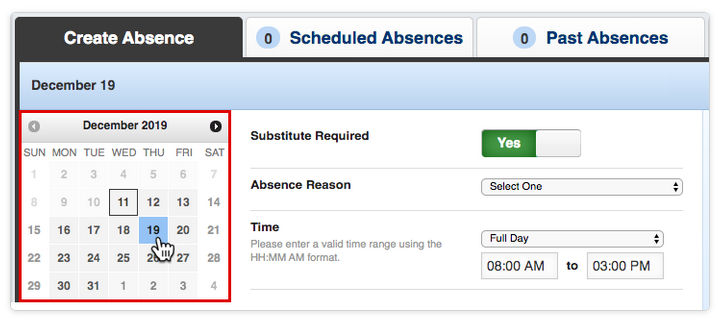
You can click multiple days to create a multi-day absence or a larger range of consecutive days, simply drag your curser to select the dates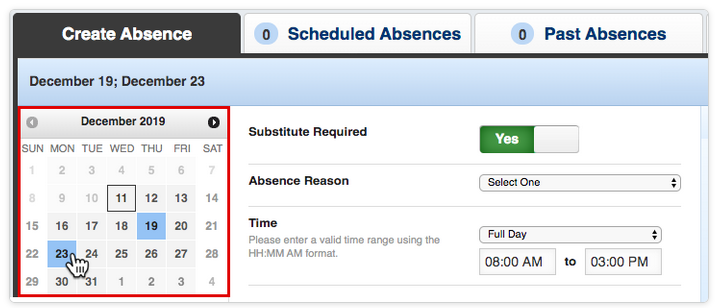
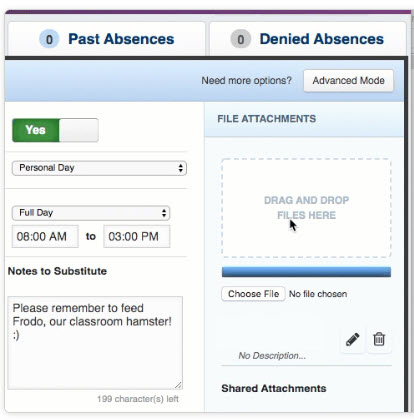
Absence Details: Absence Reason & Time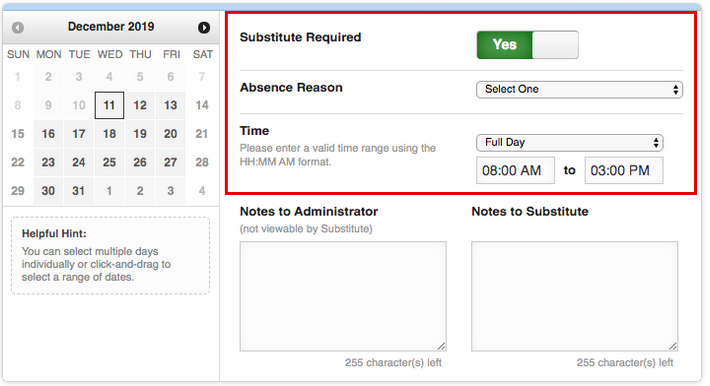
| Substitute Required | This option may already be predetermined for you, but you may have the option to choose if a substitute is needed for this absence. To change the option from Yes to No, just click to move the slider. |
| Absence Reason | Choose your absence reason from the dropdown list. (These options are pre-determined for you by your system Administrator.) |
| Time | Choose what type of absence this is. Is it a Full Day Absence? Is it a Half Day Absence? Depending on your district's setup you may have the option to choose a custom absence as well. If you do need to enter custom times, choose Custom from the dropdown and enter the custom times in the boxes provided. |
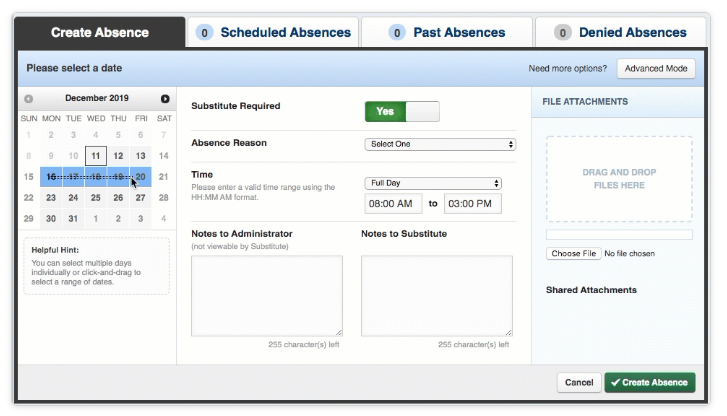
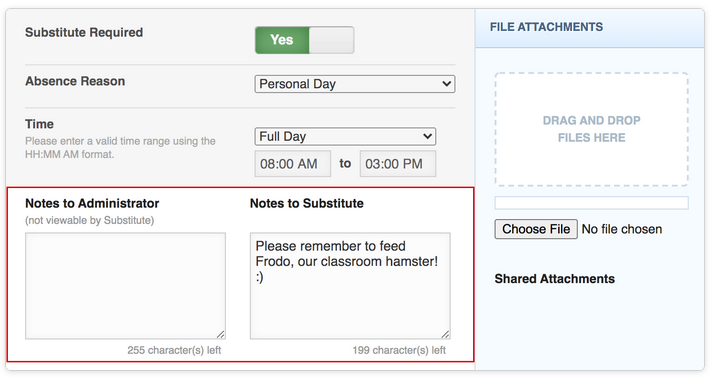
Operation Details: The system also provides a few optional entries (e.g. notes to Admin, notes to Sub. etc.) to further support those will review and fulfill your absence. The notes you leave for the administer will not be visible to the substitute, but the notes you leave for he substitute will be visible to the administrator.
Attach a File: Absence Management allows you to attach files for your substitute to reference. (These documents might include lesson plans, seating charts, etc.) To attach a file, click the Choose File button and browse your computer for the file you want to attach. If you are using a web browser (e.g. Chrome or Safari), you may also be able to drag the file right into the drop area, as seen in the example below.
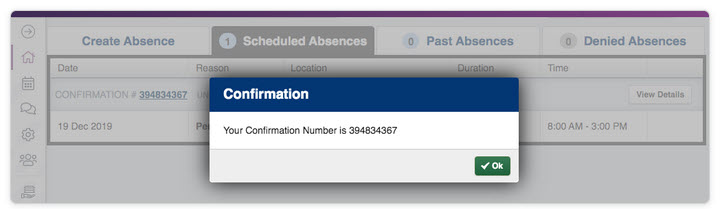
Saving the Absence: Once you have filled in all the required fields, click the Create Absencebutton at the bottom right corner. Once the absence is saved, you will see a message with a confirmation number, and the absence will appear under the "Scheduled Absences" tab
Creating a Multi-School Absence
Watch a video on how to create an absence for multiple schools
Viewing Scheduled Absences
Any upcoming absences that you have created in Absence Management can be found under the "Scheduled Absences" tab on your home page. The number on the tab indicates how many absences you have scheduled.
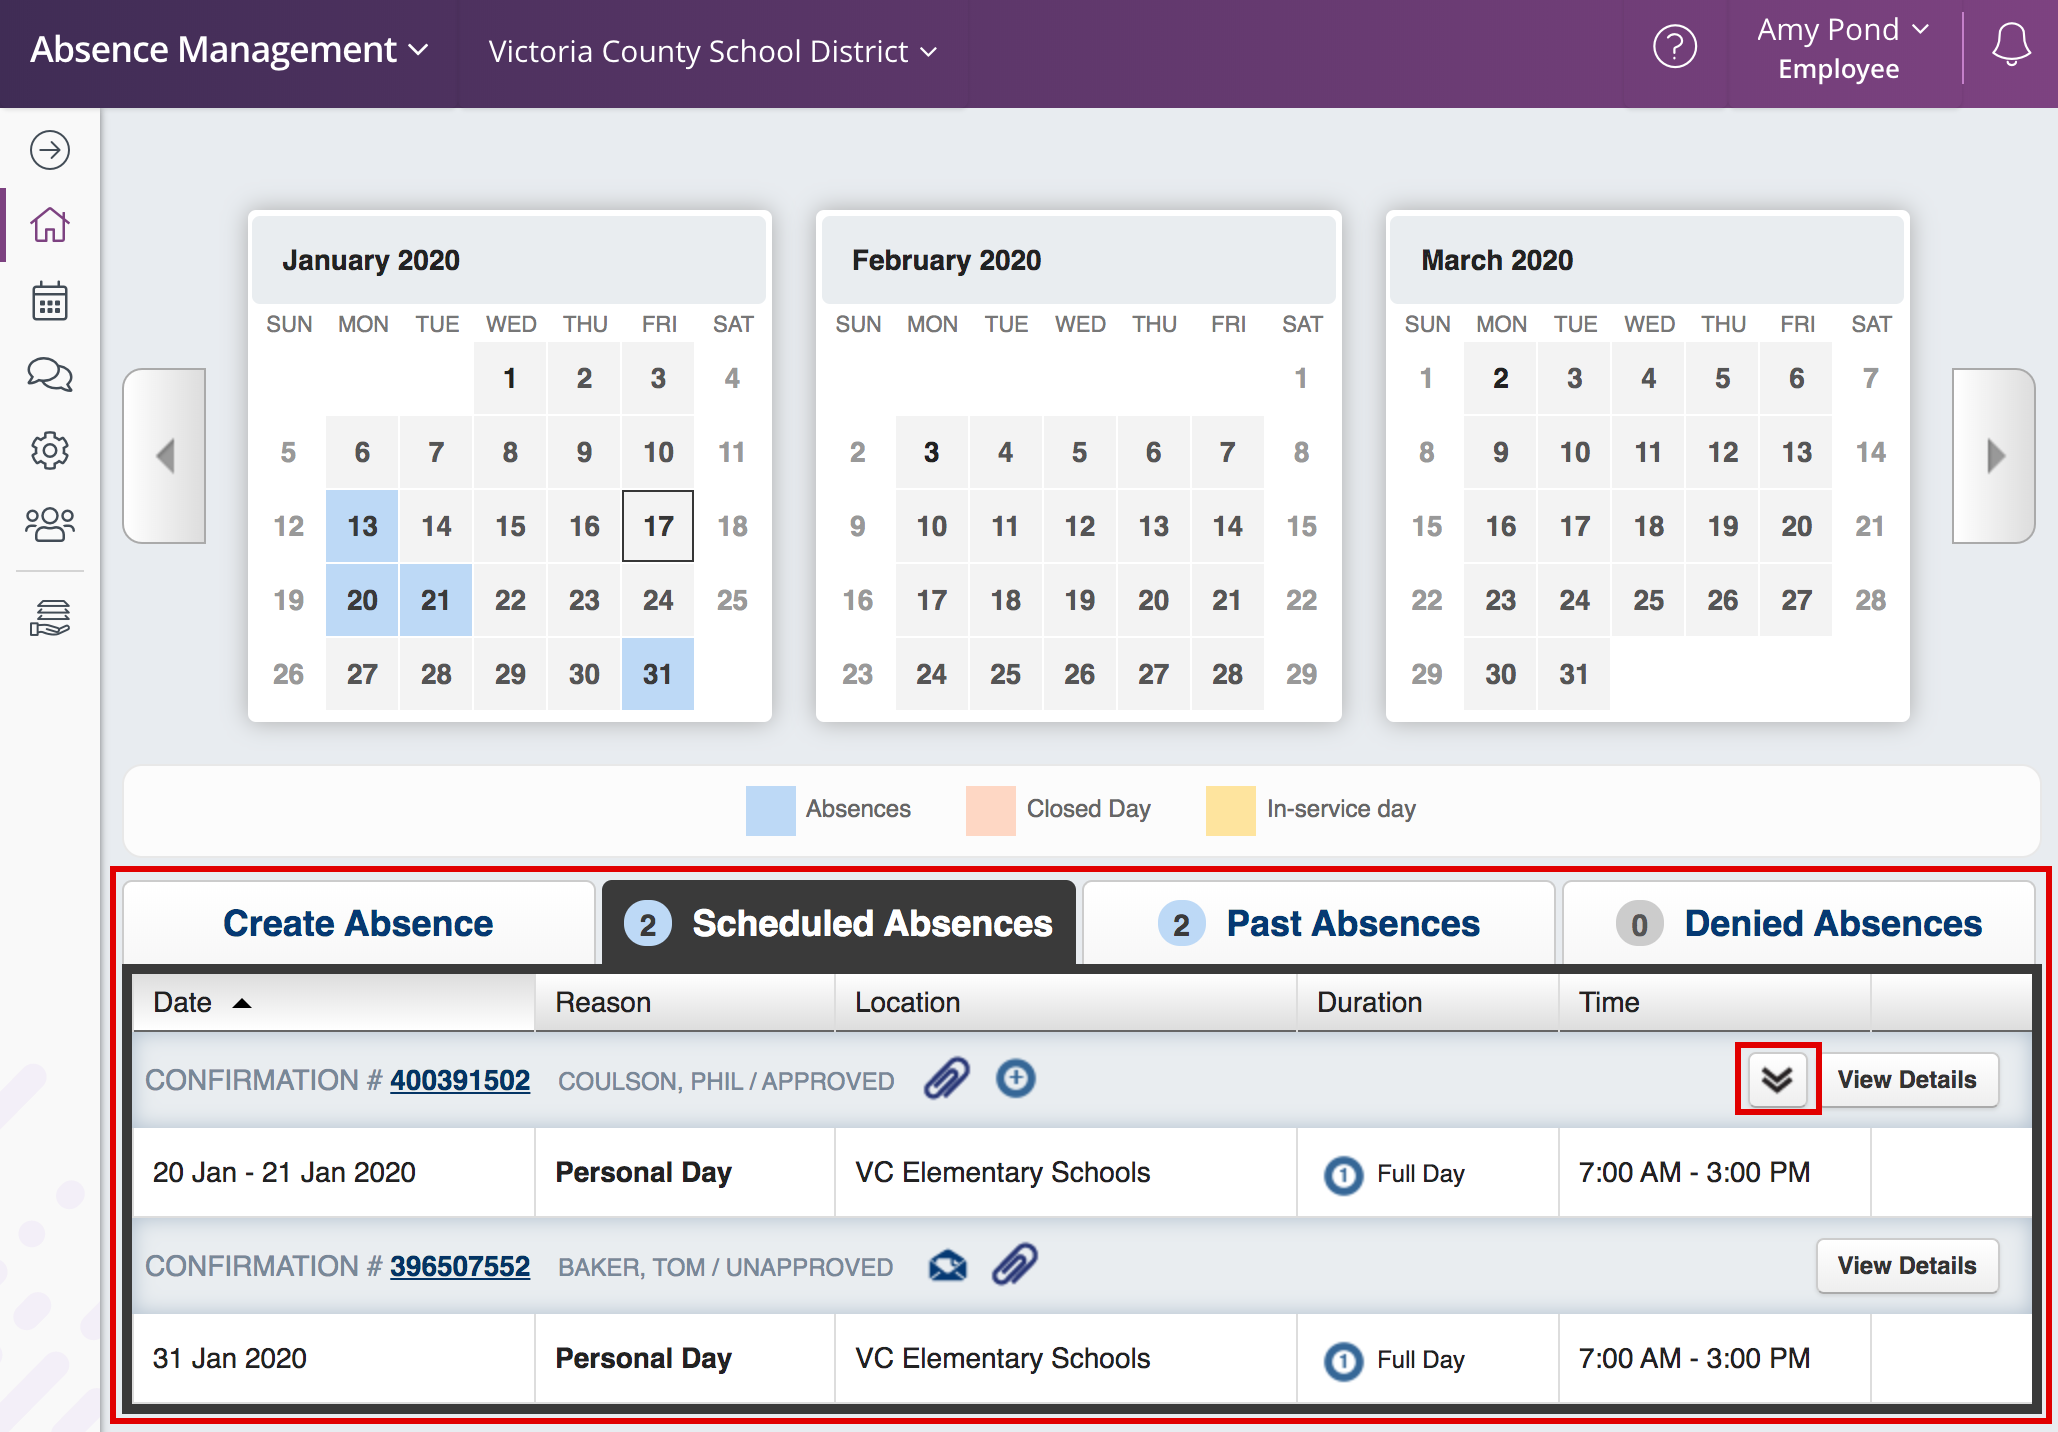
Each absence is represented by two lines. The top line shows the confirmation number, fill status, and approval status. The second line shows the date of the absence, absence reason, and the times of the absence.
If the absence is a multi-day absence, you can expand it to view the individual days by clicking the expand icon
Absence Management via Phone
In addition to web-based, you can also create absences, manage personal information, check absence reason balances, and more, all over the phone.
To call the Absence Management system, dial 1-800-942-3767. You’ll be prompted to enter your ID number (followed by the # sign) and then your PIN number (followed by the # sign).
Over the phone you can:
- Create an absence (within the next 30 days) - Press 1
- To enter an absence for today - Press 1
- To enter an absence for tomorrow - Press 2
- To enter an absence for another day - Press 3
- To return to the main menu - Press *
- Review upcoming absences - Press 3
- To hear the information again - Press 2
- To hear absences for the next 30 days - Press 3
- To listen to the next absence - Press 4
- To return to the main menu - Press 5
- Review a specific absence - Press 4
- Enter the confirmation number followed by the # sign.
- To hear the information again - Press 1
- To cancel a job - Press 2
- Review or change your personal information - Press 5
- To change the name recording - Press 1
- To change the PIN number - Press 2
- To change the phone number - Press 3
- To return to the main menu - Press *
Additional Resources: Basic Training for Employees
Professional Growth
Activities - Sign Up
Login
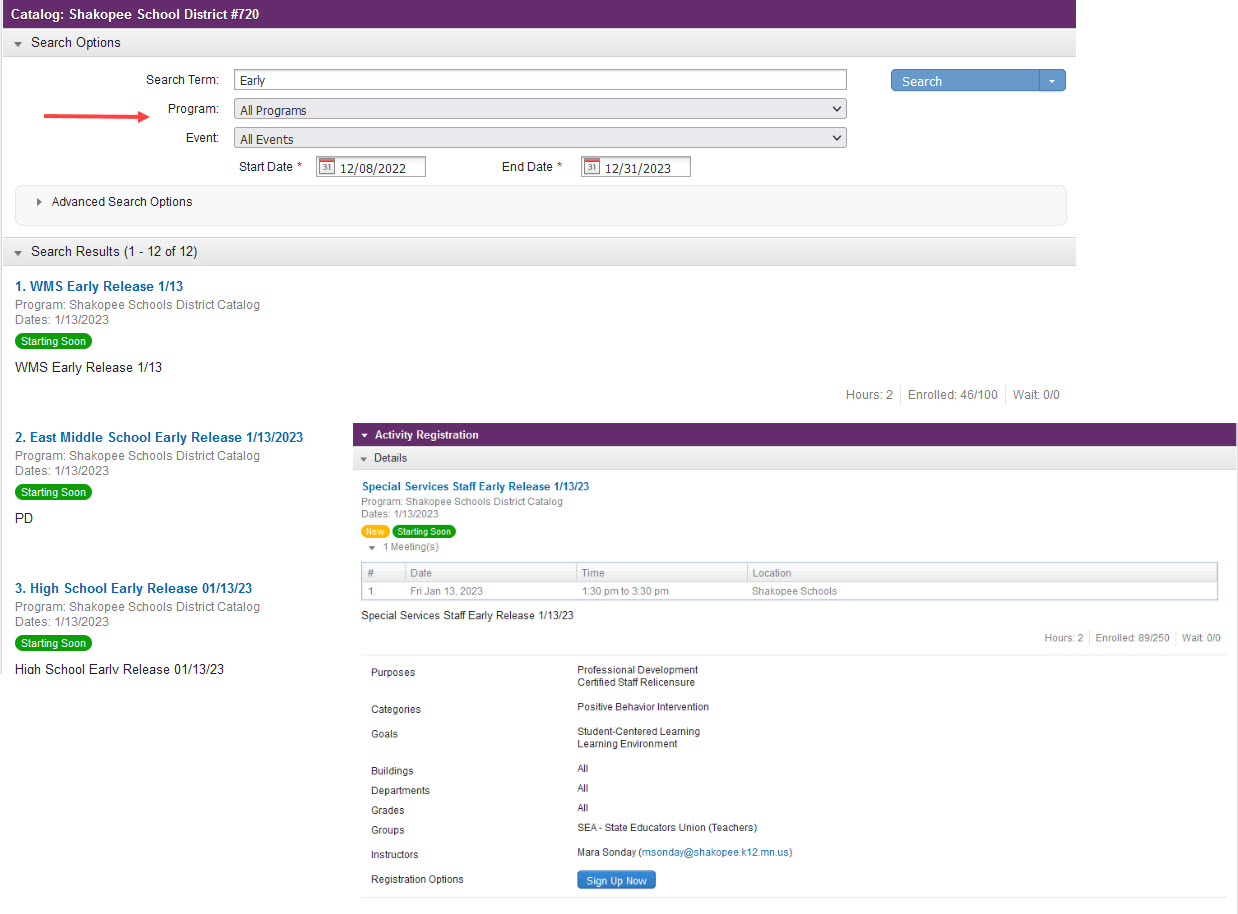
From the Left Navigation > Click Activity Catalogs
Click District Catalog/Calendar (whichever view you prefer)
Results can be narrowed down by using the Search Options
Click Activity Name > Sign Up Now
CEU Portfolio
My Info > PORTFOLIO
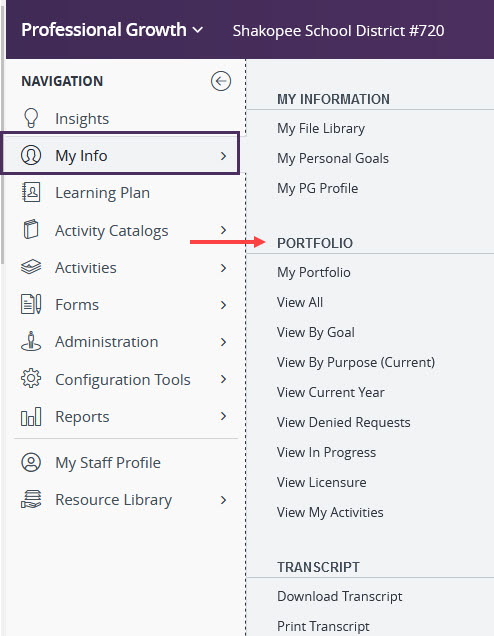
• View By Purpose (Current) is the recommended view for viewing your portfolio. This view will allow you to see your hours by credit type and year. You may need to scroll to the bottom of your transcript to see all of your hours.
CEU Transcript
My Info > TRANSCRIPT
Download Transcript (XLS)
Print Transcript (PDF)
![]()
CEU Upload
To request CEU's for an out of district Professional Development activity, you need to complete a CEU Request Form.
Forms > FILL-IN FORMS
Certified or NonCertified Request Form

Troubleshooting
Why are my hours/credits not showing for the course I recently attended?
It's likely your activity has not been fully approved and set to a completed status. If your activity is in a completed status and you have not been awarded hours/credits please reach out to your organization administrator for additional assistance.
Why are courses appearing twice in my portfolio?
There are a few different reasons why an activity might appear twice in your portfolio.
Portfolio View: The Purpose view or “View by Purpose” area will show a listing of activities where a Purpose has been checked-off on the registration form. If your registration form has more than one purpose selected, the activity will show under each purpose in this view. Viewing your transcript or “View All” will provide an accurate view of your total hours/credits.
Multiple Forms: When you register for an activity - either through your District’s catalog or through an outside provider’s catalog - a registration form is generated for you. In these cases, there is no need to complete a fill-in form located on the left navigation pane of your account.
Many times, users will complete a fill-in form to request credit for an activity they have already registered for, and this creates duplication. The best way to distinguish the registration type and/or status is by accessing the forms’ Reference Id.
Why am I unable to find an Activity to register for?
If you see your buildings activities but are unable to find a specific PD course, the activity may be assigned to a specific group you are not a part of. Reach out to the Instructor of the activity.
If you are unable to see any activities you may need to contact HR to verify your building assignment in Frontline.
Why isn't my online activity status showing as "Complete"?
In order for an online resource to be logged as "complete" you must perform the following:
- Watch the video in its entirety (without skipping/fast-forwarding through the video).
- Complete the online course in its entirety by clicking through each slide/page individually and completing any quiz or survey at the end with a passing score.
- Allow up to 5-10 minutes for the system to sync your completion status.
If you have completed all of the above steps, please check Resource Library > My History to confirm that the system has recorded your interaction with the resource
Time and Attendance
Frontline Mobile App
Frontline mobile app vendor documentation
Getting Started
In preparation, please ensure you meet the following qualifications prior to downloading the app:
- You must already have a Frontline ID account with a single username and password.
- Once these requirements are met, search "Frontline Education" within the mobile app store and download the Frontline app.
- Then, click Get Started
Key Features
The homepage displays information applicable to your permission setup. Potential in-app features include current absence details, clock-in/out functionality, timesheet details, and the option to schedule an absence.